Hello dear readers,
I've created a SmugMug website where you can easily order prints of my photos. There are currently about 100 of my best photos from the last two years available, and a select few older ones. More older ones are coming. If you want a print of something that isn't on there, let me know and I'll add it.
Unfortunately it costs $20 a month to keep the site up, so... please buy something :/ I've set the profit margin at 30%, so for every $10 you spend, $7 is actual printing cost and $3 goes into keeping the site available.
Click here to go browse.
Friday, December 20, 2013
Tuesday, September 3, 2013
What settings should I use to take good pictures of the aurora?
Common question, but just stop now because you're going about this all wrong. There's no magic setting for your camera that will work for any aurora. If you just want to set your camera to something that 'works' and leave it alone, go to another site. You can find plenty of sites that will tell you how to set your camera so you can get mediocre pictures of green fog in the sky. If you want to take good aurora pictures, you need to forget the idea that it's just some particular settings you can look up somewhere. The good news is what you need to do isn't really very hard.
Caveat: There are a lot of ways to get the same result. Don't get caught up in the method. This is how I do it, and I present it as a starting point you can build off of.
Step 1: Visualize. Always. Know what you want your picture to look like before you ever touch the camera. For aurorae, that probably means you want the brightest part of the lights to be slightly above a midtone (but that's not a given! Think about other things you could do...) So if you were to do something silly like try to meter off the aurora, you'd turn the exposure to one stop above the meter reading. But that would be silly because you don't want to be futzing about with a meter while the aurora is going, that's a distraction. The point here is that you should have an idea of how bright the aurora should look on your screen and histogram, not that you should focus on getting it exactly 1 stop above midtone or something like that.
Set your camera to full manual mode. There are three ways you can set the exposure: Aperture, shutter speed, and sensitivity (ISO). For aurorae you're probably just going to have the aperture as wide open as it'll go, or perhaps down a stop to help with sharpness, so you basically consider aperture as non-adjustable. Therefore you can only adjust the exposure via shutter speed or sensitivity.
Shutter speed should be matched to the time scale that the aurora is changing. Otherwise all the fine structure will blur out and you'll just get green fog. For a dynamic aurora, that might mean one second, whereas for quiet times that might be 30 seconds. Just take a picture and look at it on your preview screen. Do you see all the details or are they blurred out? If they're blurred out, use a faster shutter speed, if not, you might be able to use a slower shutter speed, which will allow you to use a lower sensitivity and get a less noisy picture. Set the shutter speed as slow as you can while still being able to see structure/detail in the aurora. A little noise is better than featureless green fog. And you can get away with running more noise reduction than you would with pictures of other things.
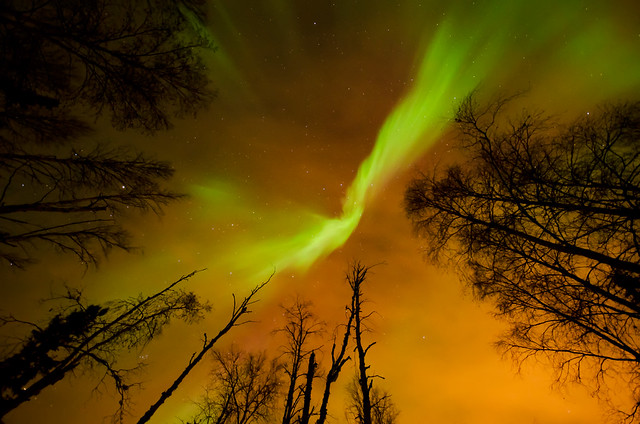
That leaves ISO. Check the histogram and the preview screen and turn up the sensitivity however much you need to mach your visualization from Step 1. The goal is to not have anything clipped off either side of the histogram, but on a dark night with no light pollution of course you're not going to be able to do that because the dark parts of the sky and ground will be off the left and the stars will be off the right, so just look to make sure you have a good portion of the exposure somewhere in the middle of the histogram. Compare that with the preview image. If it's not bright enough, increase the sensitivity; if it is, maybe you can get away with lower sensitivity (which means less noise). Eventually you'll get to the point where raising the ISO any more means unacceptable noise, and you'll be better off trying to increase the exposure in Photoshop or something. You'll only learn where the cutoff is from experience as you learn your camera's noise characteristics at different sensitivities.
FWIW, I always adjust all my settings in whole-stop increments because it's easier to think about, thus faster to respond to changing conditions and less 'in the way' of the creative process.
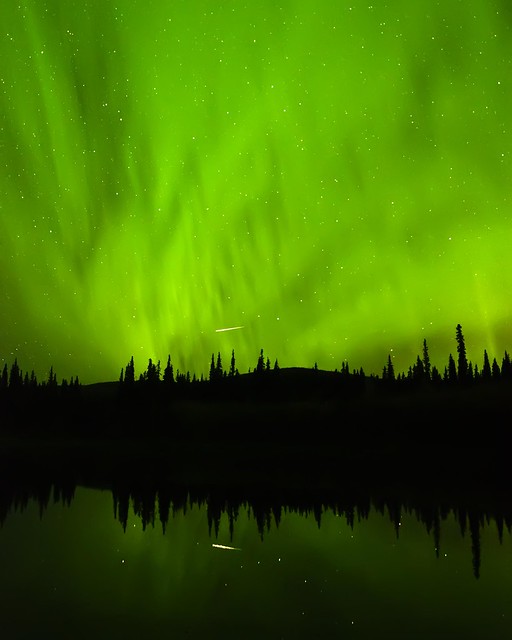
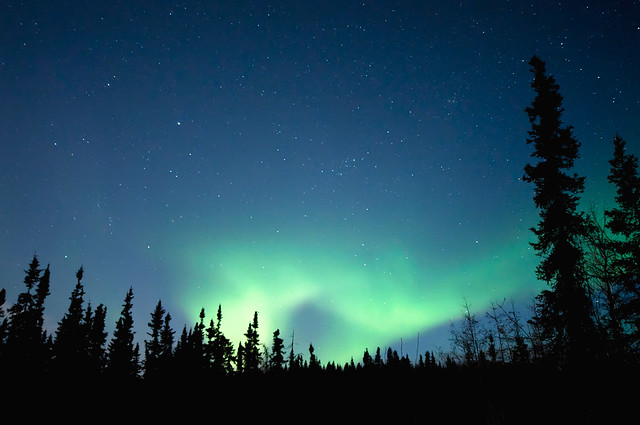
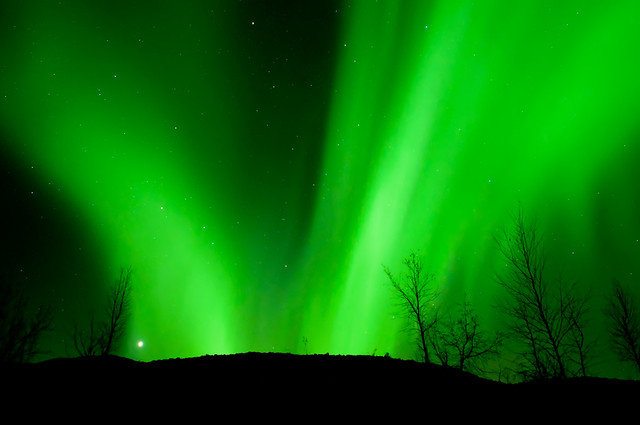
That's all you need to do to get the exposure right. Open the aperture as much as you can, set the shutter speed to match the auroral time scale, and raise the sensitivity until it's bright enough. Easy. Of course, that only gets you a good exposure, it doesn't guarantee the image will be interesting. There are a kajillion images out there of the horizon with the aurora above it, and maybe a mountain. Unless the aurora is doing something really unusual, you're going to have to do better than that. Finding a good foreground object is a good start. I'm still exploring how to actually take an interesting picture of the aurora, and I'm not yet sure how to do it. The images I've included here got it right, I think, for one reason or another.

Caveat: There are a lot of ways to get the same result. Don't get caught up in the method. This is how I do it, and I present it as a starting point you can build off of.
Step 1: Visualize. Always. Know what you want your picture to look like before you ever touch the camera. For aurorae, that probably means you want the brightest part of the lights to be slightly above a midtone (but that's not a given! Think about other things you could do...) So if you were to do something silly like try to meter off the aurora, you'd turn the exposure to one stop above the meter reading. But that would be silly because you don't want to be futzing about with a meter while the aurora is going, that's a distraction. The point here is that you should have an idea of how bright the aurora should look on your screen and histogram, not that you should focus on getting it exactly 1 stop above midtone or something like that.

Set your camera to full manual mode. There are three ways you can set the exposure: Aperture, shutter speed, and sensitivity (ISO). For aurorae you're probably just going to have the aperture as wide open as it'll go, or perhaps down a stop to help with sharpness, so you basically consider aperture as non-adjustable. Therefore you can only adjust the exposure via shutter speed or sensitivity.
Shutter speed should be matched to the time scale that the aurora is changing. Otherwise all the fine structure will blur out and you'll just get green fog. For a dynamic aurora, that might mean one second, whereas for quiet times that might be 30 seconds. Just take a picture and look at it on your preview screen. Do you see all the details or are they blurred out? If they're blurred out, use a faster shutter speed, if not, you might be able to use a slower shutter speed, which will allow you to use a lower sensitivity and get a less noisy picture. Set the shutter speed as slow as you can while still being able to see structure/detail in the aurora. A little noise is better than featureless green fog. And you can get away with running more noise reduction than you would with pictures of other things.

That leaves ISO. Check the histogram and the preview screen and turn up the sensitivity however much you need to mach your visualization from Step 1. The goal is to not have anything clipped off either side of the histogram, but on a dark night with no light pollution of course you're not going to be able to do that because the dark parts of the sky and ground will be off the left and the stars will be off the right, so just look to make sure you have a good portion of the exposure somewhere in the middle of the histogram. Compare that with the preview image. If it's not bright enough, increase the sensitivity; if it is, maybe you can get away with lower sensitivity (which means less noise). Eventually you'll get to the point where raising the ISO any more means unacceptable noise, and you'll be better off trying to increase the exposure in Photoshop or something. You'll only learn where the cutoff is from experience as you learn your camera's noise characteristics at different sensitivities.
FWIW, I always adjust all my settings in whole-stop increments because it's easier to think about, thus faster to respond to changing conditions and less 'in the way' of the creative process.

That's all you need to do to get the exposure right. Open the aperture as much as you can, set the shutter speed to match the auroral time scale, and raise the sensitivity until it's bright enough. Easy. Of course, that only gets you a good exposure, it doesn't guarantee the image will be interesting. There are a kajillion images out there of the horizon with the aurora above it, and maybe a mountain. Unless the aurora is doing something really unusual, you're going to have to do better than that. Finding a good foreground object is a good start. I'm still exploring how to actually take an interesting picture of the aurora, and I'm not yet sure how to do it. The images I've included here got it right, I think, for one reason or another.
Wednesday, August 28, 2013
I am in Alaska
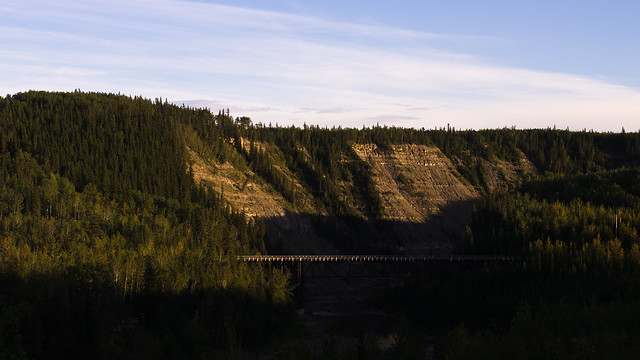
Fairbanks, specifically, and it's sooo pleasant here this time of year. I'm getting back into the groove of coming in to the GI each day to read and write. And of course I'm already planning weekend adventures. The drive up was uneventful, I took the 'direct' route, I70 -> I15 -> Alaska Highway, in order to save time. Definitely take the Cassiar Highway over the Alaska Highway if it's wilderness and adventure you want. I did timelapse the whole thing. Here are a couple of pictures from along the way:
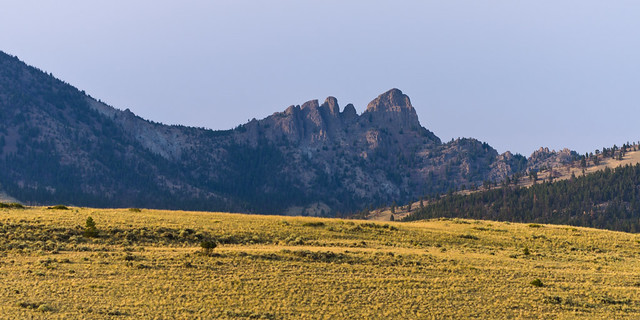


Mountain near Gates of the Mountains in Montana.

A somewhat boring image of the Kiskatinaw curved wooden bridge on the old Alaska Highway.

Canadian traffic jam.

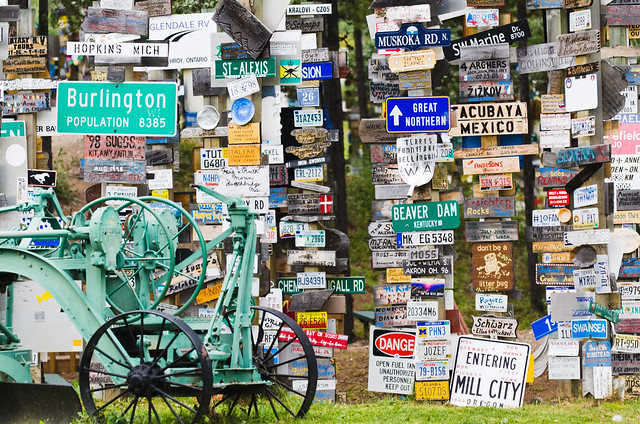
Signpost forest in Watson Lake.
Monday, August 19, 2013
I am in Arkansas
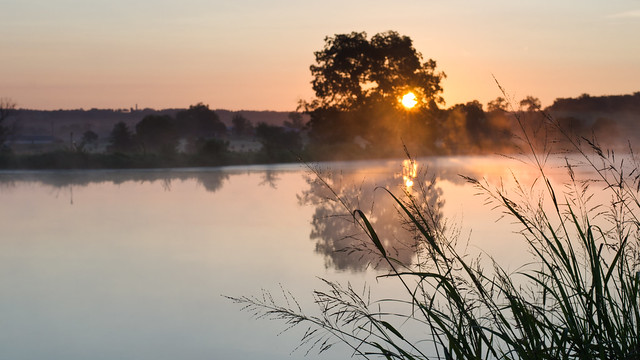
I've been here since last Wednesday. Came to visit some people once more before I disappear to Alaska for four months. It's been a good time, though I must admit there are a few I'd like a little more time with, but c'est la vie. I plan to leave for AK on Tuesday or Wednesday and be in Fairbanks next Monday or Tuesday. We had a nice going away party last night, or as my friend Colby liked to call it, a 'go away' party, since we just had a going away party for me before the sprites campaign when no one expected me to come back afterward.
The sprites media frenzy has settled down but is not yet back to zero. I had over 70,000 views on my Flickr page in one day, which easily beats my previous record of 20,000. All in all I got around a quarter million views last week, and I'm still running several thousand per day. If I had charged a penny per view I'd be able to buy a D600 off it.
I imagine I'll have something interesting to post once I'm back on the move again. For now, here's a funnel web spider:

Wednesday, August 14, 2013
Sprites 2013: Final Update
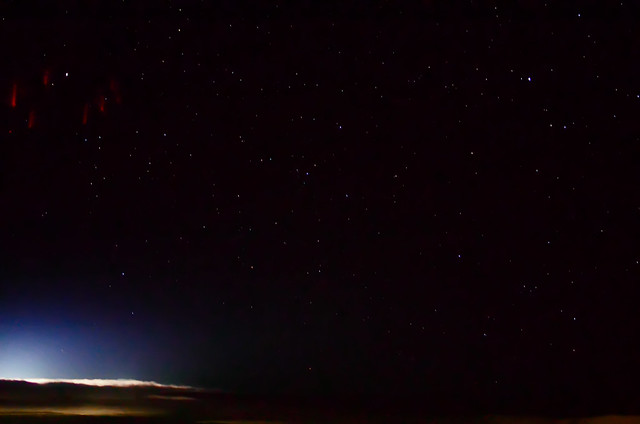
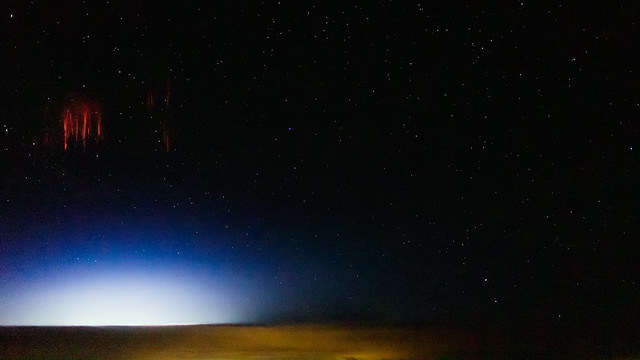
We flew the final mission of the campaign on the night of 12-13 August. It was pretty much a bust: The storm which looked active died out right when we got off the ground. We only captured two sprites to the high speed cameras, neither of which was in the field of view of the dSLR. Geoff's camera, facing out the opposite side with a wider angle lens, caught three wimpy sprites, and that was it for dSLR shots - 3 sprites in 11,000 images. Not good at all. However, two of those three I actually managed to see with my naked eyes, so that's pretty cool. Here they are:
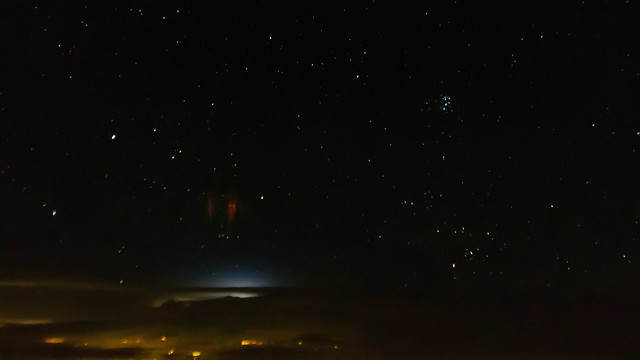
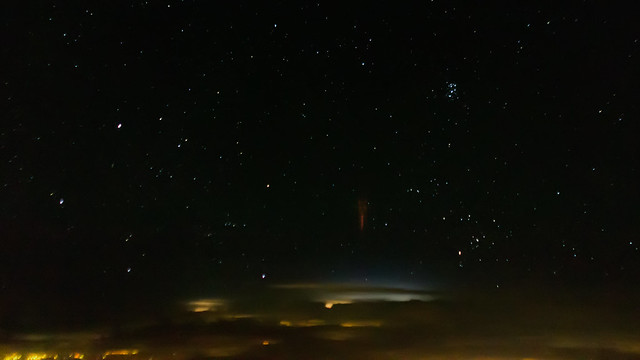
I now realize that I saw one the other night when I was seeing all the jets, and just didn't recognize it as such, so that's three I've seen by naked eye. Not bad.
I guess that wraps up the campaign. Pretty anticlimactic. I was hoping to use what I'd learned so far to get a shot that eclipsed all the previous ones, but if there are no sprites when we're up there I can't do much. Sprites 2013 is at an end.
Tuesday, August 13, 2013
Sprites 2013: Update #6
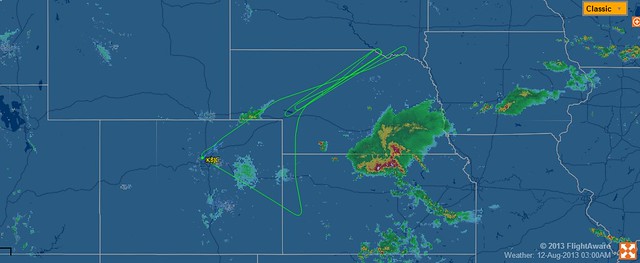
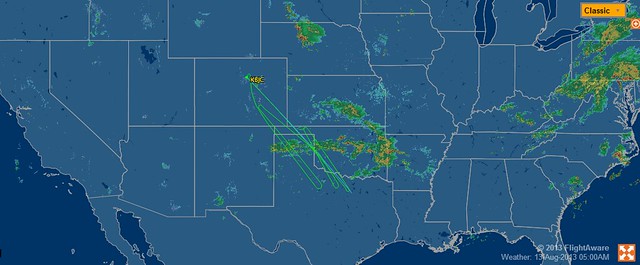
We flew again Sunday night / Monday morning, flight path above in green. The weather was marginal, but it went much better than expected. We got 9 or 10 sprites on the high speed, two of which were concurrent with the dSLR. This one - the best of the night - was on the final leg.
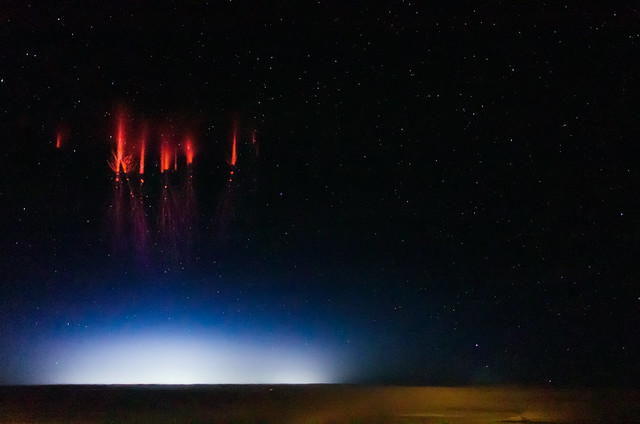
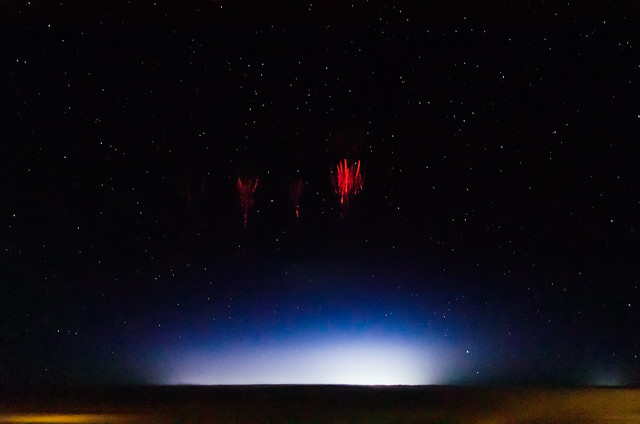
Most of what we saw were C-sprites, short for 'Column sprites' or 'Columnar sprites' - it just refers to their shape as tall, single columns. Here's a really good example of C-sprites:
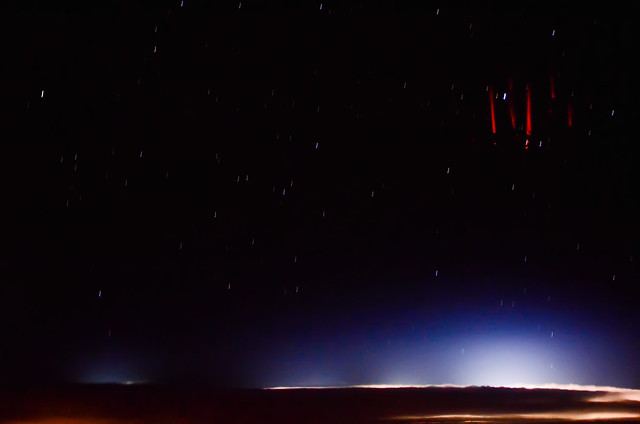
And here are the same sprites in the high speed:
And here's another set, grouped in a ring called a crown:
With high speed video:
There's these strange groups of columns stuck together at the end like a bundle of sticks:
A less impressive / more noisy image:
And lastly, this sprite was pretty dim so I boosted the exposure pretty hard, and what popped out?
See the (faint!) green striations across the lower half of the image? Airglow! Never expected to get that in a three-quarter second exposure. It's a chemiluminescence - emission of light by chemical reaction - effect common across the world, but very dim and unnoticed by virtually everyone. The primary color is the same 557nm green line from the aurora, which indicates we're looking at the emissions from excited atomic oxygen, up above 100km altitude.
For this flight Geoff brought his own camera (D5100) aboard on a freshly purchased GorillaPod, to mimic my setup from last time on the opposite side of the aircraft. So now we have coverage on the left (science) side with my D7000 and a 'normal' 35mm lens, and coverage on the right (non-science) side with the D5100 and a wider 24mm lens. On the previous flight I burned through my 64Gb memory card really surprisingly quickly, so we brought 3 new 64Gb cards aboard (thanks Ryan!), for a total of 2x64Gb + 1x32Gb memory per camera, and we switched to shooting JPG fine rather than RAW images. This was a mistake: Once the JPG compression crunches the dark noise, I can't subtract it back out again. Fortunately I recognized we had memory to burn on the last leg and I switched back to RAW for the final data run, which is when I captured the best sprites.
As I write this, we've actually just finished flying another mission, our last of this campaign. But since it's 5 in the morning and I have to meet in 6 hours to remove the cameras from the aircraft then drive 13 hours, I'm going to save that update for later - when I have time to go through the 11,000 pictures (seriously!) and look for good sprites. I will say that I finally saw a sprite naked-eye; two of them, both recorded on Geoff's camera.
Until then.
Sunday, August 11, 2013
Hey look
Source:
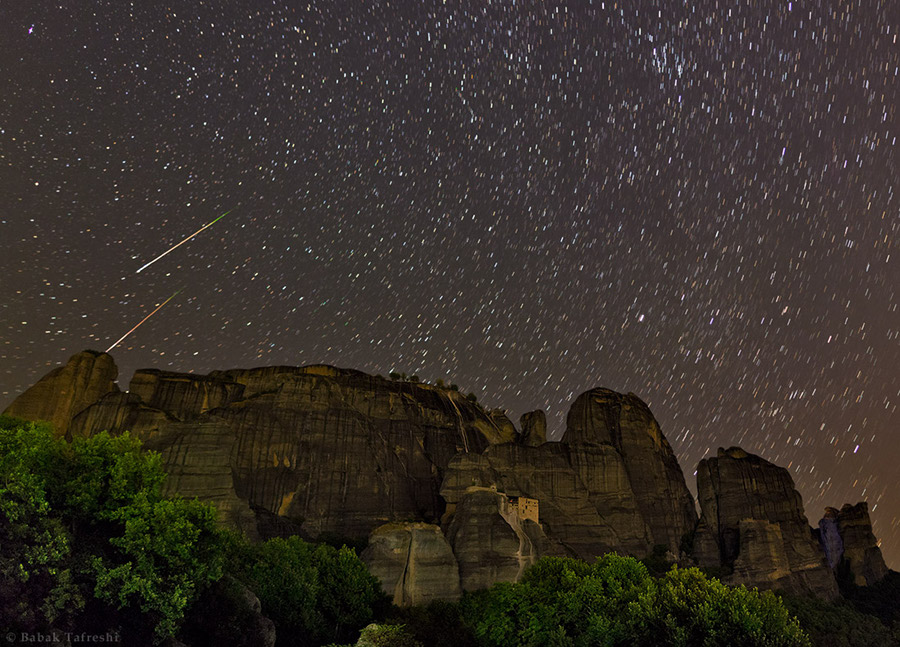
Meteors change color as they come down. I've never noticed this before. I looked up a few other pictures and they all seem to have the same color profile - green on the top changing to pink. The American Meteor Society says "The majority of light from a fireball radiates from a compact cloud of material immediately surrounding the meteoroid or closely trailing it. 95% of this cloud consists of atoms from the surrounding atmosphere" And I know meteors occur in the same altitude regime that auroras occur. I therefore postulate that the green top end is the molecular oxygen emission changing to the pink nitrogen emission at the 100km cutoff level. So I suppose now I can actually locate a meteor in Lat/Long just from a picture, provided the meteor was bright enough to show color.
All's quiet on the sprites front. Just waiting for the right storm.
13Aug2013 edit: Nope, that's not quite right...
I took this Sunday night from the Gulfstream:
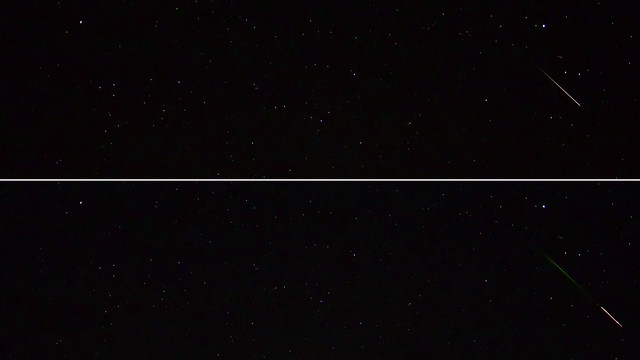
It's a meteor in two consecutive frames with a one second cadence. And look, the part of the trail that was white in the first frame turns green in the second. I mean, duh. The green is not a prompt emission, it takes about a second after the oxygen atom is excited before it spits out a green photon. The meteor comes through and excites the oxygen (top frame), then a second later the oxygen de-excites and spits out some green (bottom frame). So looking at meteor images, the point where the trace turns from green to pinkish white is not the 100km level, it's just where the meteor was when the exposure began, and the green part is where the meteor was before the exposure began, just now emitting green. It's actually a pretty neat illustration of a forbidden transition, and I'll probably use it as an example in the future.
I should know these things.
Meteors change color as they come down. I've never noticed this before. I looked up a few other pictures and they all seem to have the same color profile - green on the top changing to pink. The American Meteor Society says "The majority of light from a fireball radiates from a compact cloud of material immediately surrounding the meteoroid or closely trailing it. 95% of this cloud consists of atoms from the surrounding atmosphere" And I know meteors occur in the same altitude regime that auroras occur. I therefore postulate that the green top end is the molecular oxygen emission changing to the pink nitrogen emission at the 100km cutoff level. So I suppose now I can actually locate a meteor in Lat/Long just from a picture, provided the meteor was bright enough to show color.
All's quiet on the sprites front. Just waiting for the right storm.
13Aug2013 edit: Nope, that's not quite right...
I took this Sunday night from the Gulfstream:

It's a meteor in two consecutive frames with a one second cadence. And look, the part of the trail that was white in the first frame turns green in the second. I mean, duh. The green is not a prompt emission, it takes about a second after the oxygen atom is excited before it spits out a green photon. The meteor comes through and excites the oxygen (top frame), then a second later the oxygen de-excites and spits out some green (bottom frame). So looking at meteor images, the point where the trace turns from green to pinkish white is not the 100km level, it's just where the meteor was when the exposure began, and the green part is where the meteor was before the exposure began, just now emitting green. It's actually a pretty neat illustration of a forbidden transition, and I'll probably use it as an example in the future.
I should know these things.
Thursday, August 8, 2013
Sprites 2013: Press notes
No flights the last few nights due to unfavorable weather, but the internet (the cool parts of it anyway) is somewhat abuzz with the image and video I put up with the last post. This has taken off a bit more than I thought it would. Universe Today and Spaceweather.com were expected, but now more mainstream media is jumping on board. I'm going to use this post to archive some of the articles, beware that below the page break lies a bunch of copypaste from news sites. And if you know of one I'm missing, please comment or send it to me.
Tuesday, August 6, 2013
Sprites 2013: Update #5
We flew again tonight, but kind of got burned by the storm. There was a large number of positive charge-moment-change around 8:00 when we were planning, and just the lightning map in general looked like an unusually high number of positive strokes. Normally we see about 1 positive stroke out of every 10 or so, but tonight it seemed like it was around 50/50. And that was reflected among separate storms across the US, making you think there must be something larger controlling the fraction of positive strokes. It's interesting.
Anyway, we took off around 9:00pm, based on the fact that there was a very cold storm with lots of positive CMC, which is exactly what we look for. But it just died almost as soon as we were in the air. There was still a lot of lightning, but the big positive CMCs almost disappeared. I don't know what happened, and I actually don't think anyone knows enough about what sets the fraction of positive lightning strokes to really explain what happened. We had a long discussion about this over post-flight beer - someone should really figure this out.
But long story short, we only recorded two sprites to high speed tonight, neither of which was very good. One we only got the upper halo part of (which is pretty useless as spectra goes), and the other saturated the intensifier, so we can't use its spectrum either. We called the flight early, and now have about 10 flight hours left. Enough for two 5-hour flights, or, if our next flight is good, we'll just stay in the air as long as we can and call that the end.
On the plus side, I got another sprite in my dSLR. This whole time I've wanted to use a tripod to place my camera in a window and just let it shoot, but the NCAR folks are pretty strict about stuff like that. Well everyone was interested enough in my shots from last time that I was able to ride the good spirits into putting my camera into the window with a gorilla pod, using my bandanna as a dark cloth. Looks like this:

The first of the two sprites tonight was too far forward to catch in the Nikon, but I did manage to catch the second one:

And, since we caught it on high speed as well, here's the same sprite at 10,000 frames per second, slowed down by about 666x:
Anyway, we took off around 9:00pm, based on the fact that there was a very cold storm with lots of positive CMC, which is exactly what we look for. But it just died almost as soon as we were in the air. There was still a lot of lightning, but the big positive CMCs almost disappeared. I don't know what happened, and I actually don't think anyone knows enough about what sets the fraction of positive lightning strokes to really explain what happened. We had a long discussion about this over post-flight beer - someone should really figure this out.
But long story short, we only recorded two sprites to high speed tonight, neither of which was very good. One we only got the upper halo part of (which is pretty useless as spectra goes), and the other saturated the intensifier, so we can't use its spectrum either. We called the flight early, and now have about 10 flight hours left. Enough for two 5-hour flights, or, if our next flight is good, we'll just stay in the air as long as we can and call that the end.
On the plus side, I got another sprite in my dSLR. This whole time I've wanted to use a tripod to place my camera in a window and just let it shoot, but the NCAR folks are pretty strict about stuff like that. Well everyone was interested enough in my shots from last time that I was able to ride the good spirits into putting my camera into the window with a gorilla pod, using my bandanna as a dark cloth. Looks like this:

The first of the two sprites tonight was too far forward to catch in the Nikon, but I did manage to catch the second one:

And, since we caught it on high speed as well, here's the same sprite at 10,000 frames per second, slowed down by about 666x:
So that's pretty cool. Since we still have 1 or maybe 2 flights left in this campaign, I'm still hoping to capture something that puts this to shame :P but if this is the best I get, it's still pretty damn good. And, the PI's are so impressed that they want me to put some real effort into this on the next campaign. It's a great public outreach opportunity, as demonstrated by the fact that my Flickr page got more than 10,000 views on the day I put the first pictures up. So if I don't get the shot to end all shots this campaign, I'll be well ready for it next time...
Edit: Oh yeah! In the sprite excitement I almost forgot we had some quite nice evening light while fueling the aircraft and waiting for dark:
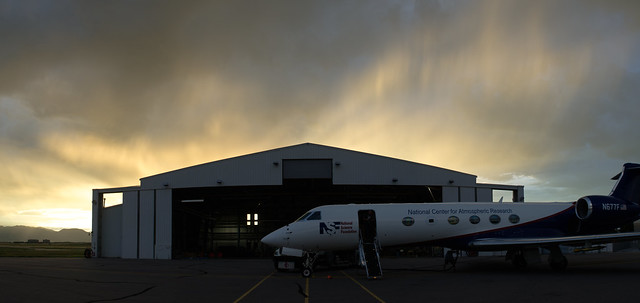

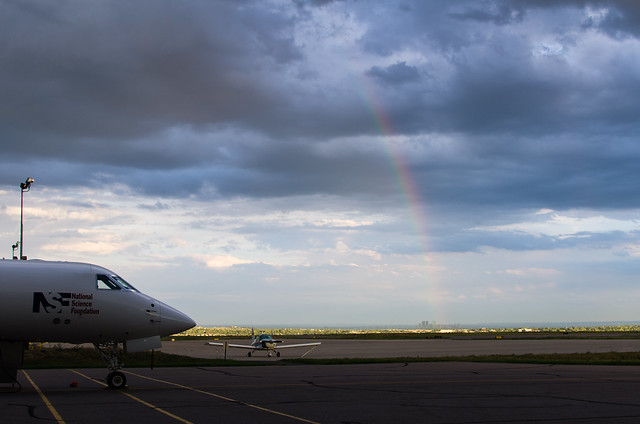
Edit: Oh yeah! In the sprite excitement I almost forgot we had some quite nice evening light while fueling the aircraft and waiting for dark:


Saturday, August 3, 2013
Sprites 2013: Update #4

Last night we got out on the north edge of the storm and ran 'racetrack' paths back and forth. Scientifically, it wasn't a great night. The storm was nice and productive when we arrived on station, but the activity was spread out along a line, rather than focused in a hotspot, which makes pointing the cameras much more difficult - we basically wait to see sprites in the wide angle context cameras, then point in the spot they just happened. Well when the sprites are occurring all over the place that doesn't work so well. We only captured 7 sprites to high speed, and only one had a really usable spectra. After the first two racetracks the storm died off and we didn't really see anything for the next two, so we called it a night and went home.

Flight path in green.
However, I'm thrilled about last night for other reasons: I managed to capture both jets and sprites with my dSLR! I only know of a couple examples off the top of my head where people have captured sprites in SLRs, and I can't find any examples of jets captured with SLRs - am I the first? Since jets tend to hug the top of the clouds it's understandable that they're more difficult for a ground observer to see/photograph, so it makes sense that being up in a sprite-chasing aircraft would give me a serious advantage. The photo at the top of this post is, IMO, the cream of the crop, despite the strong motion blurring (the pilot would pick that moment to hit a bump...) It shows three jets shooting out of the cloud top just above some lightning, and it's even fairly well composed. Magic. Here is a good shot of a single jet - it looks like a blue butane lighter flame sticking out of the top of the cloud:
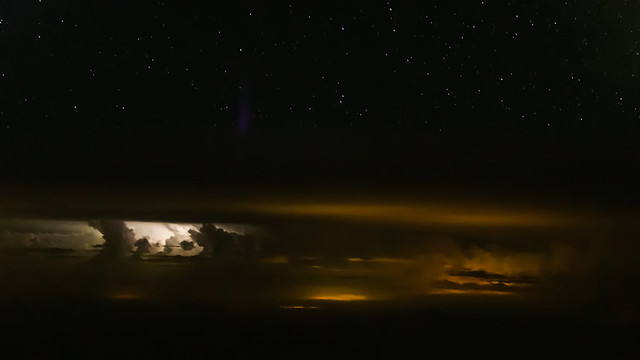
And here's the sprite I got, it's the red alien jellyfish on the top right:

Since I have a good starfield in both images, and I know we were about 200 kilometers from the electrically productive part of the storm, I can estimate the size of these things... but it's far easier to wait for the astrometry.net solver to give me a degrees/pixel solution than to figure it out myself, so we'll just wait for that.
For the technical aspect (skip this paragraph if you don't care about photography), I was shooting 1 second exposures, from a moving aircraft, handheld. I butted the camera up against the window glass and put my weight on it to get rid of most of the wobblies and light leaks, but the motion of the aircraft itself still showed up, especially when we hit a patch of turbulence (we are, you know, flying right next to a thunderstorm). The city lights on the ground showed quite a bit more motion trailing than the stars so I cropped them out, but it was interesting to notice. For purposes of focus you think of both the city lights and the stars as being 'at infinity', but for purposes of parallax they really aren't. The instantaneous phenomena, the lightning, jets and sprites, show no motion blur. I used a 35mm f/1.8 lens held wide open, ran the camera at ISO 6400, subtracted a dark frame from all of them to get rid of the systematic noise, then ran strong noise reduction to help with the random noise. Some light dodging on the TLE's to make them a little more visible, but they are otherwise pretty much as-shot.
I was also able to see quite a few jets with my naked eyes! That's a first for me, and I'm always excited to see a new sky phenomenon for myself. I still haven't been able to see a sprite naked-eye, and it impresses me just how difficult that actually is. I'm flying in a private jet, right next to a thunderstorm, for the specific purpose of imaging sprites. I have very good low light eyesight, and I've watched tons of sprites in real time on the context cameras so I know exactly what and where to look. I was watching intently out the window while I snapped these shots, and the camera caught a sprite that I didn't see. Garggghhh! Since a typical sprite only lasts a couple of milliseconds, it's entirely possible it happened during a moment I looked away, or blinked. But still... Takeshi did manage to see one by eye last night, his first, so I'm not giving up yet.
Friday, August 2, 2013
Sprites 2013: Update #3

We flew again last night, the route shown above. More trouble with high cirrus clouds on the south and east sides of the storm, but eventually we came into clear air on the north side and were able to record 13 sprites in the high speed cameras. Fiddling about in the clouds for a couple of hours seems to be par for the course for this campaign. We used another 6 hours of flight time, leaving us around 18 more hours in the campaign. We're currently sitting at NCAR RAF and waiting to see how the weather will be tonight before making a decision to fly again: There currently isn't a lot of storm or electrical activity out there, much less the large positive charge-moment-changes we want to see, but the CAPE indicates huge instability out over the middle of Kansas, so we're hoping something will pop up.
I drove up through some of the canyons in the mountains today: It's really quite nice up there away from all the traffic and subdivisions. Because I have nothing else to add, here's a barn I saw today:
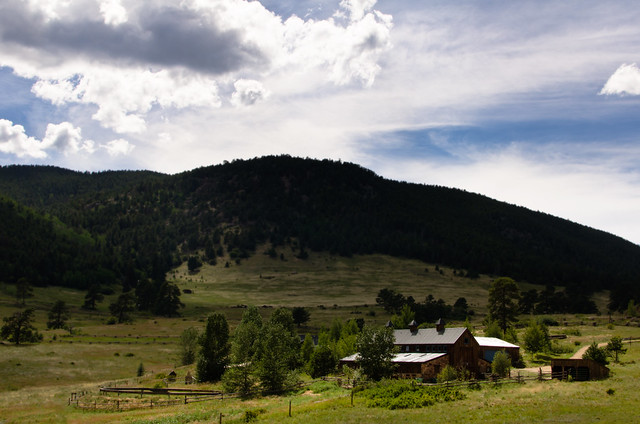
Update: As hoped for, a storm has formed in the middle of Kansas. It's very cold in the IR satellite imagery and the cirrus clouds are pretty confined this time. Pretty much exactly what we're looking for. Planning to take off at 10:30.
Wednesday, July 31, 2013
Sprites 2013: Update #2
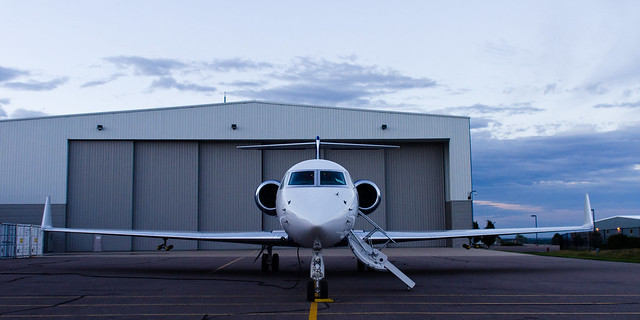
We flew again the other night. The storm, over much of the Oklahoma / Missouri / Arkansas area, was massive and producing a ton of lightning.
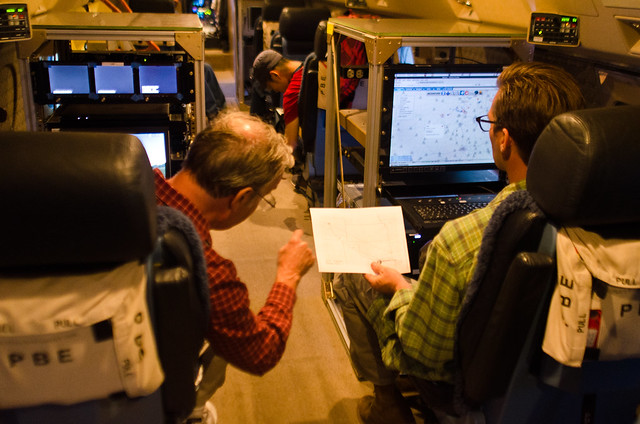
Hans and Ryan looking at weather data and planning a course before takeoff.
We took off and headed that way, but cut a corner too close and got stuck in the cirrus clouds, unable to see either stars in the sky or cities on the ground. Just a black void out the window. After turning south and flying for a while, we came into clear air, cut north and ran up the east side of the storm through western Tennessee. At this point, after wasting ~2 hours of flight time, we started seeing a few sprites, and managed to record 11 on high speed with spectra. Not bad, but not really that good either. At least it was something.
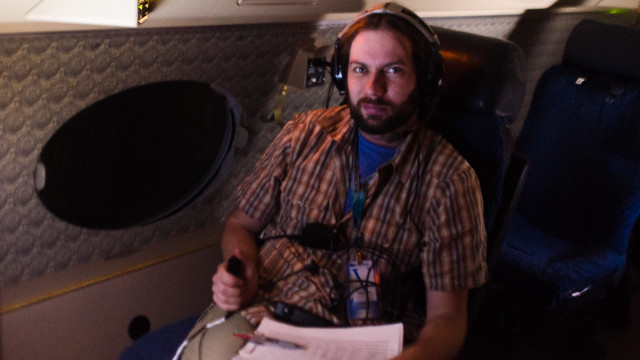
Me sitting in the trigger seat with the log in my lap and my thumb on the trigger.
Later on, I saw a bright meteor - or at least it was bright on the low light camera. I trigger the high speeds so we got spectra of the meteor as well. Totally unrelated to what we were doing, but neat anyway. Also, while sitting and watching the screen for sprites, I watched a pixel die and become 'hot'. I've never seen that before.
Last night the weather was unpromising so we stayed on the ground and fixed an issue with light leaks: The dark cloth we had attached around the windows to keep reflections out of the cameras wasn't working too well. So we hung some new dark cloth which I think is a much better design, and that has nothing to do with the fact that I designed it. We then finished up the night by walking into a bar 10 minutes before close (at midnight... : / )
Weather looks dull tonight and tomorrow too, my guess is we won't fly tonight and will call a down day tomorrow so we can be ready to fly anytime this weekend, when the potential for big storms increases again.
Monday, July 29, 2013
Sprites 2013: Update #1
We took our first flight the other night, but the weather was uncooperative. The storm we went to fly was unproductive, and high cirrus clouds with us up at 45,000 feet were bright enough in the near-full moonlight that we couldn't even turn the image intensifiers on for a while. So we basically treated it as a shakedown flight and went through the motions, found a few kinks in the system, and spent the next night in the hangar ironing them out. We should be ready for business now.
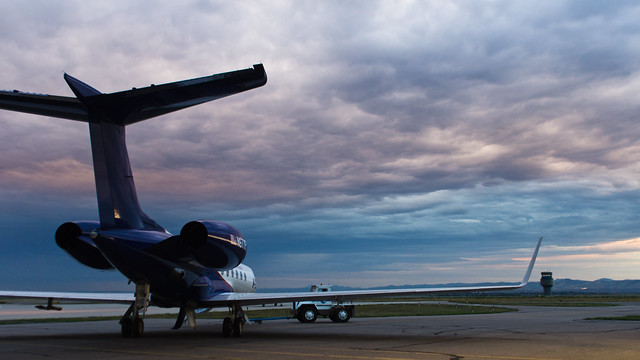
Our aircraft is NCAR's Gulfstream V, which is just a fantastic aircraft. I want one.

Inside, we have a bunch of electronics set up with seating positions for the five scientists plus an aircraft tech. And pilots, can't forget those. From front to rear, the science positions are:
1. Trigger man. This is the person who triggers the high speed camera when they see a sprite. It's a job for someone with good eyes and fast reactions, so it's where I'm sitting. I basically watch a monitor with my thumb on a trigger, and when I see a sprite in the Phantom field of view I hit the button which triggers both Phantoms to record, and yell 'Sprite!' into the headset/comms so everyone knows what just happened. At the speed we're running the Phantoms I have about 1 second in which to recognize a sprite in the field of view and hit the button. Then while the Phantoms are writing to permanent memory I record our position, heading, camera elevation/azimuth and settings into a logbook.
2 and 3. Camera operators. Their job is to physically point the cameras and to save the data after I trigger. Both of these positions have a Phantom high speed camera, running at 10,000-15,000 frames per second, on a mount facing out the window. The Phantoms have image intensifiers in front of them to be able to film low light events at such high speeds. These intensifiers are so sensitive they can be ruined by looking at the Moon, or even moonlight reflecting off a cloud, turning a ~$20,000 piece of equipment into a paperweight. In front of the intensifiers are standard Nikon F-mounts with fast 50mm Nikon lenses. The forward camera additionally has a diffraction grating in front of the lens so it can capture sprite spectra, the main focus of this campaign. There are also a few Watec 'context' cameras recording at 30 frames/second (err, 60 fields/second, but who's counting?) These context cameras have a wider field of view than the Phantoms and help us locate sprites and point the Phantoms in the right spot. One of the Watecs is what I watch on my monitor at the trigger station.
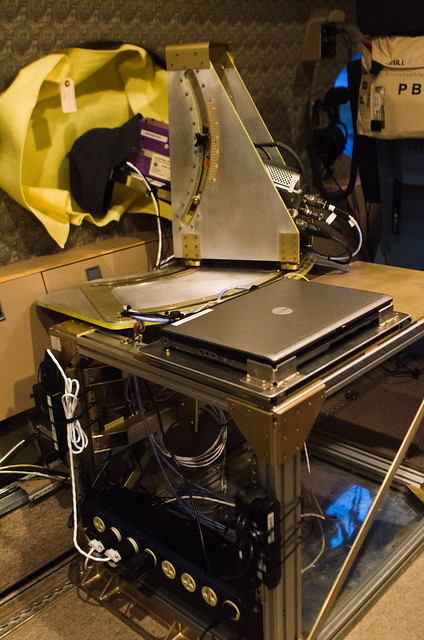
The mounts are really cool. On the campaign with NHK in 2011 we just strapped $10,000 television tripods against the wall, which sounds impressively expensive but doesn't work that well: The heads were unlevel so we had field rotation when moving the cameras in azimuth, and the axis of rotation was through the camera so the lens moved a lot when you panned, sometimes causing you to be looking at the side of the aircraft window rather than outside. These mounts are solid, level, and the rotation axis is right in front of the lenses so the lenses don't really move when you pan the camera. Awesome.
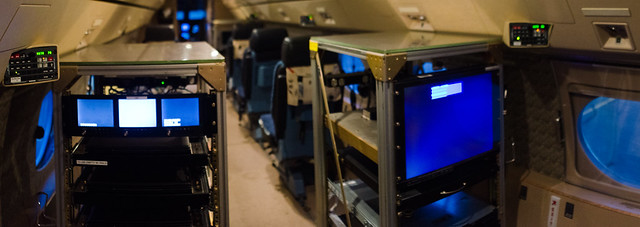
4. Sprite finder. This position has monitors displaying all the Watec cameras, and the job here is to pay attention to all of the monitors for sprites, then tell the camera operators where to point the cameras.
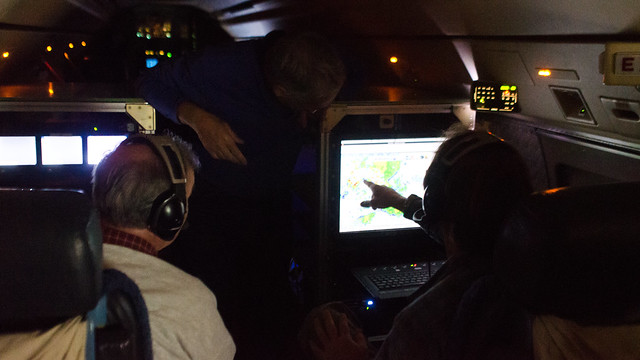
5. Mission coordinator. A computer on which the operator can call up all kinds of weather and lightning data in real time, plan where we should be flying, and inform the pilots.
It occurs to me that the only position I don't have a picture of is my position. I'll try to rectify that soon.
Our aircraft is NCAR's Gulfstream V, which is just a fantastic aircraft. I want one.

In the hangar.

On the tarmac.
Inside, we have a bunch of electronics set up with seating positions for the five scientists plus an aircraft tech. And pilots, can't forget those. From front to rear, the science positions are:
1. Trigger man. This is the person who triggers the high speed camera when they see a sprite. It's a job for someone with good eyes and fast reactions, so it's where I'm sitting. I basically watch a monitor with my thumb on a trigger, and when I see a sprite in the Phantom field of view I hit the button which triggers both Phantoms to record, and yell 'Sprite!' into the headset/comms so everyone knows what just happened. At the speed we're running the Phantoms I have about 1 second in which to recognize a sprite in the field of view and hit the button. Then while the Phantoms are writing to permanent memory I record our position, heading, camera elevation/azimuth and settings into a logbook.
2 and 3. Camera operators. Their job is to physically point the cameras and to save the data after I trigger. Both of these positions have a Phantom high speed camera, running at 10,000-15,000 frames per second, on a mount facing out the window. The Phantoms have image intensifiers in front of them to be able to film low light events at such high speeds. These intensifiers are so sensitive they can be ruined by looking at the Moon, or even moonlight reflecting off a cloud, turning a ~$20,000 piece of equipment into a paperweight. In front of the intensifiers are standard Nikon F-mounts with fast 50mm Nikon lenses. The forward camera additionally has a diffraction grating in front of the lens so it can capture sprite spectra, the main focus of this campaign. There are also a few Watec 'context' cameras recording at 30 frames/second (err, 60 fields/second, but who's counting?) These context cameras have a wider field of view than the Phantoms and help us locate sprites and point the Phantoms in the right spot. One of the Watecs is what I watch on my monitor at the trigger station.

Forward camera position. The yellow cloth is to prevent light from inside the cabin reflecting off the window and into the lenses.
The mounts are really cool. On the campaign with NHK in 2011 we just strapped $10,000 television tripods against the wall, which sounds impressively expensive but doesn't work that well: The heads were unlevel so we had field rotation when moving the cameras in azimuth, and the axis of rotation was through the camera so the lens moved a lot when you panned, sometimes causing you to be looking at the side of the aircraft window rather than outside. These mounts are solid, level, and the rotation axis is right in front of the lenses so the lenses don't really move when you pan the camera. Awesome.
4. Sprite finder. This position has monitors displaying all the Watec cameras, and the job here is to pay attention to all of the monitors for sprites, then tell the camera operators where to point the cameras.

'Finder' seat on left, mission coordinator seat on right.
5. Mission coordinator. A computer on which the operator can call up all kinds of weather and lightning data in real time, plan where we should be flying, and inform the pilots.

Hans, Geoff, and Ryan discussing the weather data in the middle of a flight.
It occurs to me that the only position I don't have a picture of is my position. I'll try to rectify that soon.
Rocky Mountain National Park
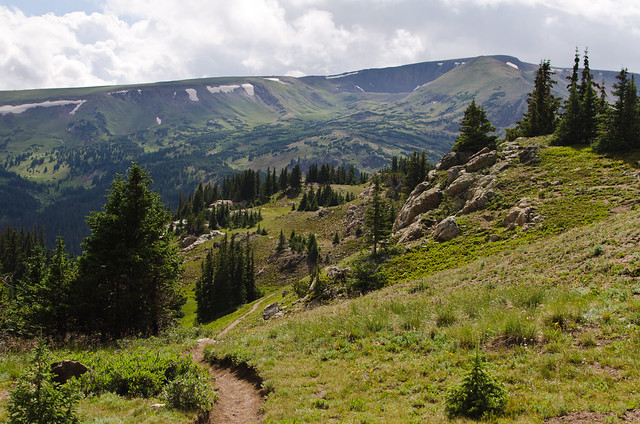
For the sprites campaign, we're only allowed to work a maximum of 6 days in a row, then we have to shut down operations for crew rest. Yesterday was our first such hard down day, so I took the opportunity to visit Rocky Mountain National Park and do a little hiking. I looked briefly at the website and decided I wanted to try and climb (or at least wander around nearby) Mount Chapin, a ~12.5 thousand foot summit in the southern Mummy Range. So I drove to RMNP and up the Old Fall River Road, which was pretty cool itself, and set out at the trailhead.
The website warned that the trail was poorly maintained and difficult to follow, but I actually found it pretty obvious and easy. I guess I'm just used to interior Alaska, where half the time there's no trail at all and you're just wandering about. From the parking area you climb up to a pass, then instead of descending the other side, you turn and start heading upwards. You come out of the trees pretty soon and it's all alpine meadows and scree slopes from there.
The parking area is around 11,000 feet. Both the Arkansas River Valley and the Tanana Valley are near sea level, so that's what I'm used to. Consequently, the altitude was kicking my butt on the uphills, so I took it nice and slow. Plus, I'm in no real hurry and have no particular destination, so why not take it easy? And the weather was great: ~70% could cover kept the direct sunlight off most of the time, and a stiff wind made it quite cool - enough to put a bite in the tips of my ears once or twice. Marvelous. It was amusing to be walking around in a thin t-shirt while everyone else had fleece jackets zipped up against the wind.
I have a tendency to not look at maps very closely before I go hiking. This is a double edged sword. On one hand, it reinforces the 'no particular destination' idea, and I spend more time wandering and enjoying where I'm at rather than focusing on where I'm going. On the other hand, it often ends up with me not really knowing exactly where I'm at. So it turns out I walked right past Mount Chapin and up the wrong mountain before I realized it. You wouldn't think accidentally walking past a mountain is something that's likely to happen, but there you go. I even surprise myself sometimes.
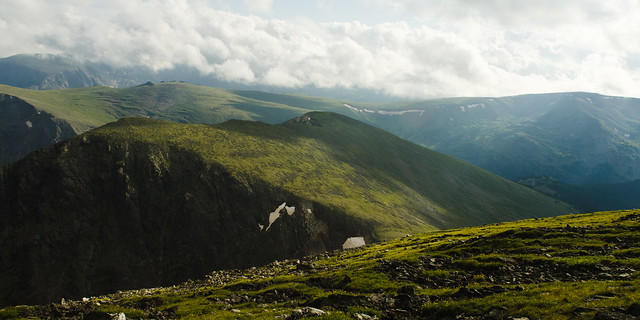
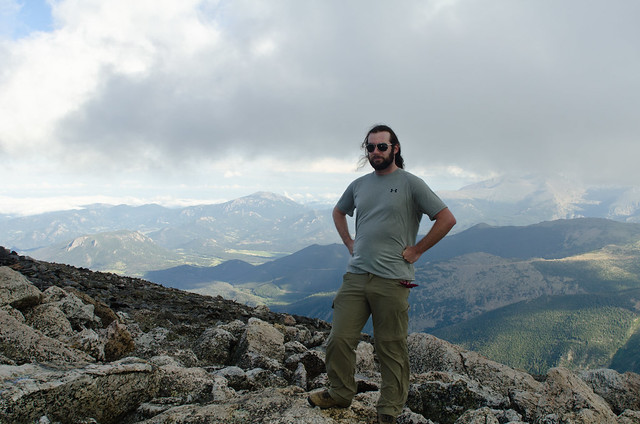
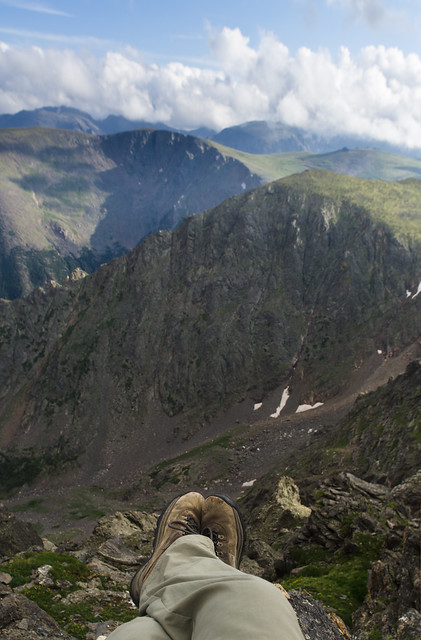
So, approaching the 12,500 13,000 foot summit of Mount Chapin Chiquita, I could see some low, grey overcast clouds on top. But I had been watching them for the last hour or so of approach, and the situation seemed to not be changing much; it looked like an orographic effect rather than a gathering storm. So I decided it was probably stable and safe to head on up. On top of Mount Chiquita I was just high enough to be in the bottom of the clouds, and it was rather chilly.
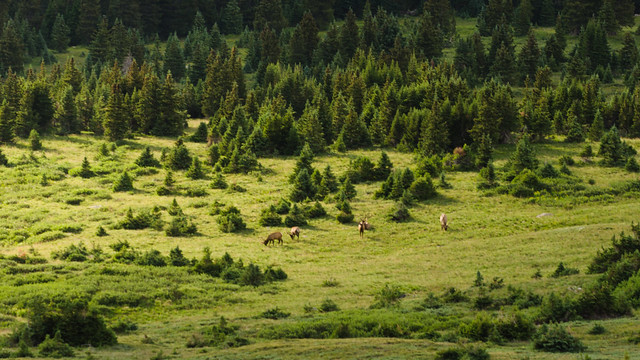
Heading back the way I came, I noticed a trail further down the mountain that looked much less rocky and side-slopey than the one I was on, and thus faster. With a strong suspicion that it went to the same place, I decided to descend the ~500 feet and try it. Right about the time I made the lower trail, I noticed a small herd of elk, perhaps 10 or 15 strong, in the valley below, with a single passing sunbeam about to illuminate them for a brief moment. I threw my bag down and barely dug out my 150mm lens in time to capture this, which ended up not really being that great anyways, but c'est la vie.
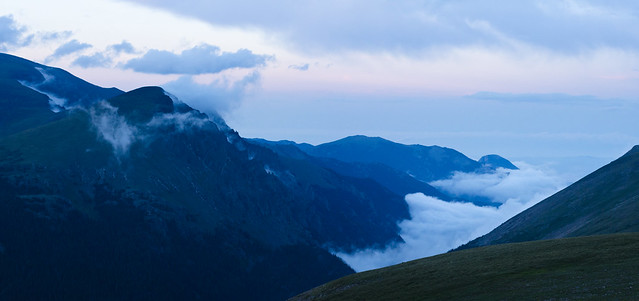
Back at the car, I noticed the main valley was filling with mist, so I stopped to grab the last picture of the night at the lava cliffs overlook.
Monday, July 22, 2013
Begin: Sprites campaign
I've been thinking about starting to update this blog again for a while now, but I never really know where to start. So I'm just going to start. If history is any guide, I'll give up on it again soon, but we'll see.
Today I started another sprites observing campaign. Similar to the campaign I worked two years ago with NHK, we'll be flying above thunderstorms in a Gulfstream, using intensified high speed cameras to capture videos of sprites at 10,000 frames per second. In that campaign we were focusing on 3 dimensional reconstruction via filming a sprite from two different locations; this time we're after high resolution spectra of the sprites. I may go into more detail in a future post, but the take home message is we're only flying one aircraft. Today we did an electromagnetic interference test where we rolled the plane out on the tarmac, fired up all the electronics as if we were taking data, and let the pilots test the avionics for interference. Apparently we passed, so we're ready to fly. We may do a short flight Thursday or Friday, but due to the Moon being almost full, our real opportunities start next week. The Gulfstream belongs to NCAR RAF (National Center for Atmospheric Research's Research Aircraft Facility - the same folks who fly through hurricanes) and we're flying out of their base at Rocky Mountain Metropolitan Airport, just outside Boulder, CO.
So being that it just started today, I don't have much to write yet. But here are a couple of pictures from recent months, taken by other people, that I thought were really cool. First:
Source
This image, taken in May, is probably the first ever image of a sprite and an aurora together. But then, only a week or so later, came another one:
Source
I don't really have anything to add. I've never captured a sprite with my own camera, but I'm going to give it a shot during this campaign.
Subscribe to:
Comments (Atom)
