Tuesday, September 23, 2014

Nabesna Ghost Town

Camping in a ghost town

This weekend I planned to take a kayak trip down the Delta River, from Tangle Lakes to just below Phelan Creek and Rainbow Ridge. But the weather forecast was bad, so at the last minute (inspired by this blog post popping up in my news feed) the plan was changed to visit the old mining town of Nabesna. Nabesna is at the end of Nabesna Road in Wrangell-St. Elias National Park, America's largest national park (larger than Vermont and New Hampshire combined), which contains only two roads: The McCarthy Road to Kennicott, where all the visitors go, and the Nabesna Road, where almost no one goes. I've been to the end of the Nabesna Road before, and walked up to the Rambler Mine, but I didn't know there was another mine and ghost town just another mile down the path.

I couldn't find much info about Nabesna online, other than it's about 2 miles past the official end of the road, so I decided to just go for it. Worst case scenario I spend a day hiking off the Nabesna Road, which isn't so bad. Drew and I left Fairbanks about 8:00pm Friday, camped out next to the Chistochina River just east of Gakona, and got up early to hit the Nabesna Road around 8:00am. We stopped at the ranger station at the beginning of the road in Slana, where we got a free CD of an audio tour to play along the road. The narration was interesting, it was worth the stop. The ranger asked where we heading and I said we wanted to try to get all the way to Nabesna. She told me what I already knew, that the road ends about 2 miles short of the town. I asked if there was any possibility of driving the final 2 miles and she said no, 'ankle express' only. I didn't press on whether she was just saying that because she didn't think we'd make it. With that, we headed down the road.

DSC_1389-2

DSC_1385-2 DSC_1382-2

For the first half of the road, there's national park on the right side and national preserve on the left side. The main difference is that only local subsistence hunters can hunt in the park. We saw many spruce grouse on the road, and we intended to make a dinner out of a few but could only go after grouse on the left side of the road. We did get 4 grouse, and decided that was enough so just passed by the rest.


By the way, do you know the fast way to clean a spruce grouse? The Alaska Fish and Game website mentions it as an aside, with the advice that it's 'probably better demonstrated than described'. So, here's a video where I demonstrate it. This is absurd enough that I think it's more interesting than anything, but this is a video of me literally ripping a grouse in half. You've been warned:


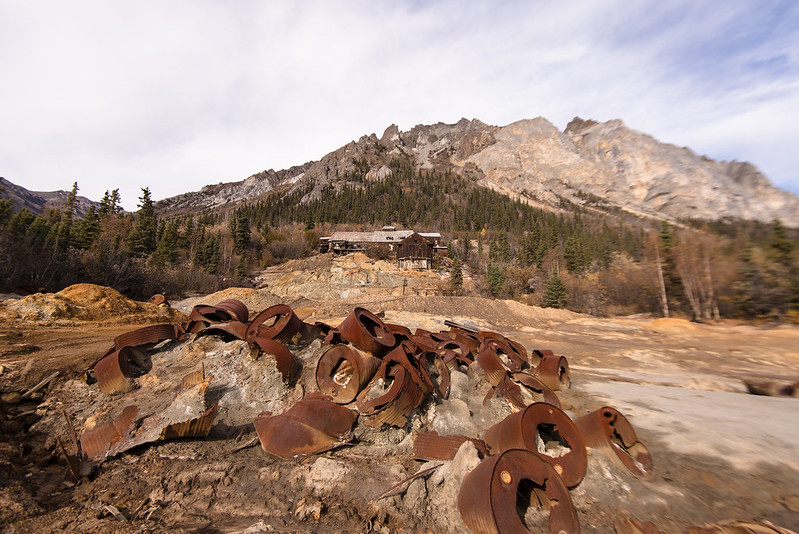
We parked at the end of the road and decided to hike the last bit to Nabesna. ~1.5 miles further on we came to a fork in the road, with a very overgrown path ahead and an opening to smelly tailings mud on the right. We took the right fork and were at what I assume was the Nabesna processing plant (the actual mine was visible much further up the mountain).

DSC_1268-2

We had left the bulk of our water supply in the car, hoping to find a stream to filter from, but none were apparent. More importantly, we realized we left the beer in the car. After walking the road in I was pretty sure my car could make it, so we left our packs, walked the short distance back to the car, and drove the car all the way in to Nabesna. No big difficulty, just an exercise in dodging ruts. A car with less ground clearance might have trouble as the entrance/exit angles ot some of the mudholes was steeper than it looks in this video. I parked at the garage next to an old yellow truck:


DSC_1360-2 DSC_1361-2

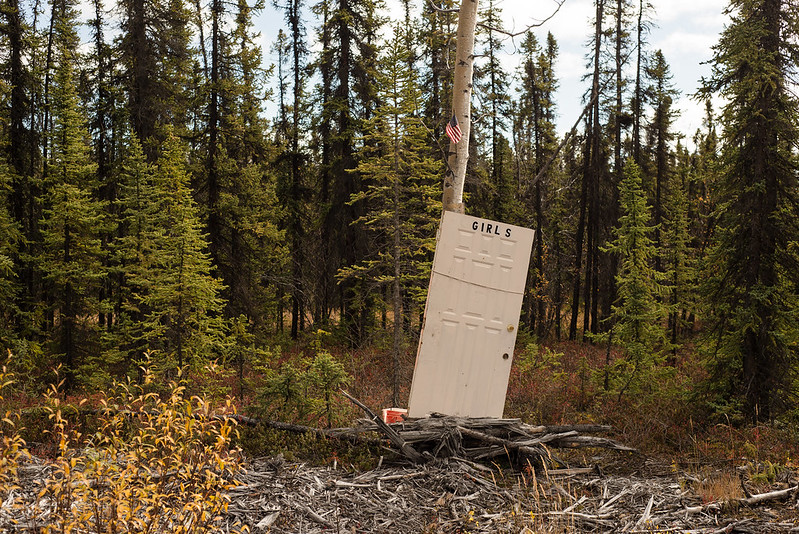
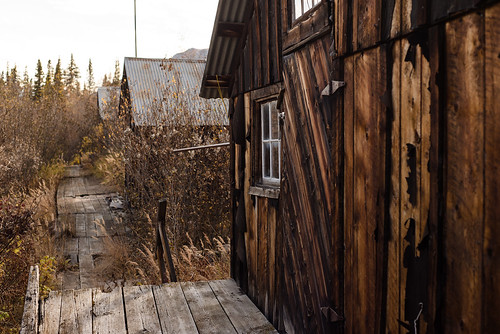
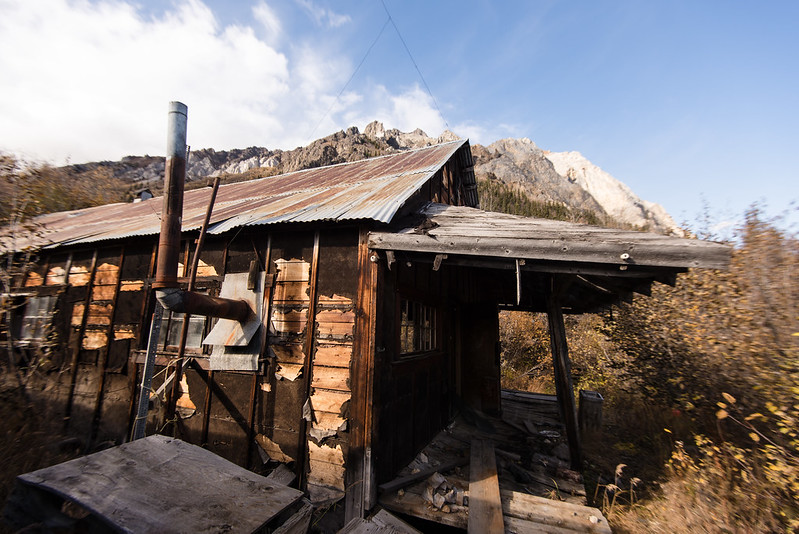
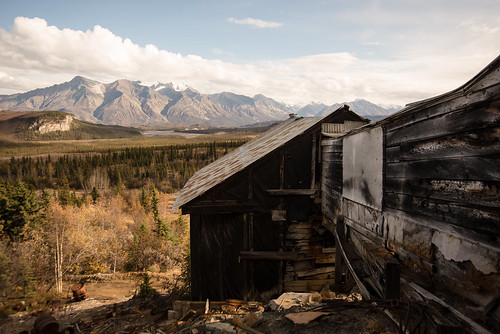
We walked on into town and started looking into the various cabins. Apparently this town once housed around 200 people. We found 4 rows of cabins, with possibly more hidden in the brush, and the two middle rows had boardwalks down them:

DSC_1272-2 DSC_1308-2

DSC_1309-2

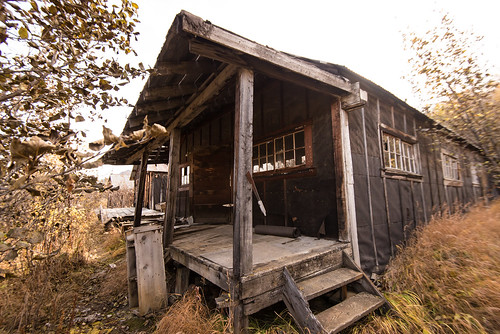
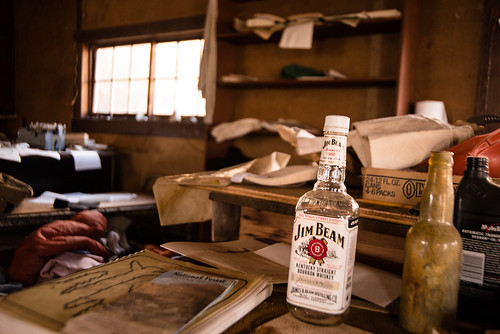
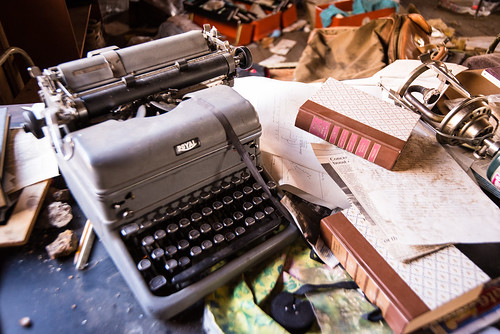
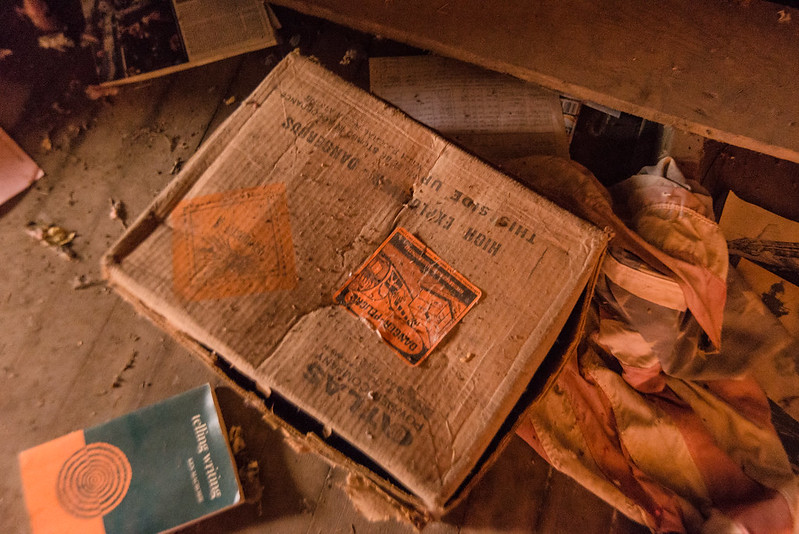
Near the center were two larger cabins which, judging by the contents, were the lab/workshop and the office/kitchen. We settled upon the office as the most welcoming, and cached our gear inside.

Nabesna AK

Time to explore!

DSC_1280-2 DSC_1285-2

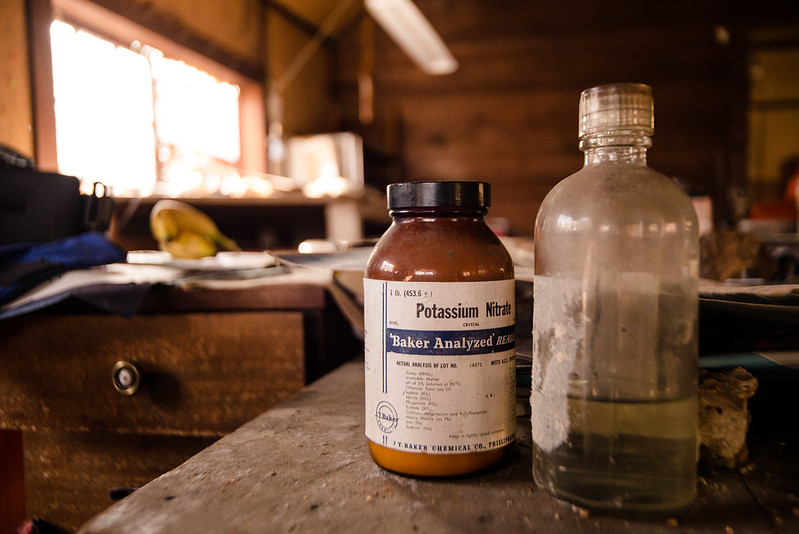
Item number one in the 'do not touch' list. Potassium Nitrate is a strong oxidizer, and being sealed for so long, crystals may form under the lid that get crushed/scraped when opened. I'm not sure how dangerous that is without a flame nearby, but now isn't the time to find out:

DSC_1286-2

DSC_1290-2 DSC_1293-2

DSC_1294-2 DSC_1295-2

Item number two for 'Do not touch'. Not sure if this is just a box or if there's actually anything dangerous in it. Old dynamite sweats nitroglycerine, which is a contact explosive:

DSC_1297-2

DSC_1298-2 DSC_1299-2

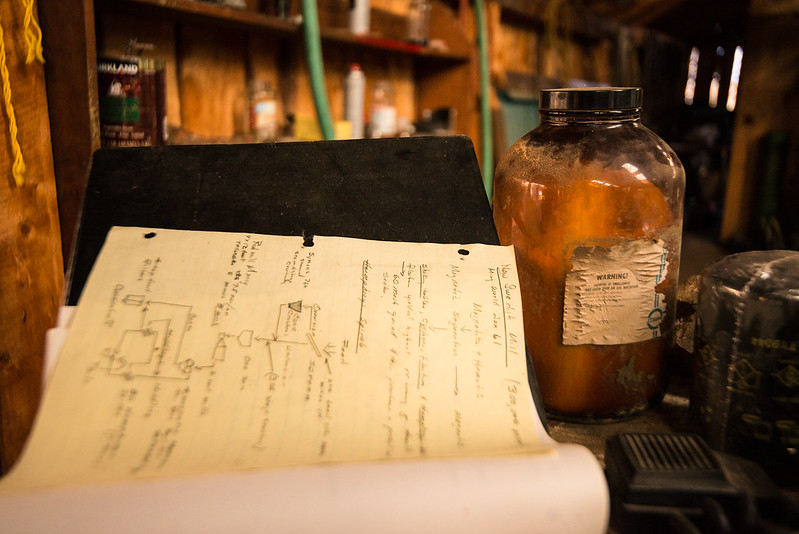
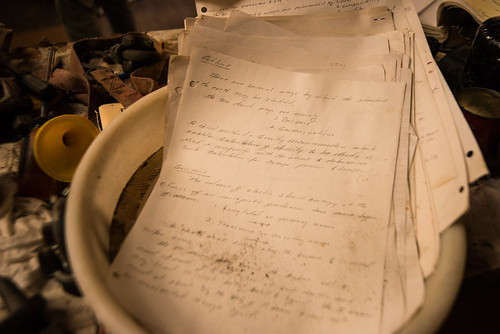
Lab notes, unmarked chemicals. We'll not touch that one too just to be safe:

DSC_1300-2

DSC_1301-2 DSC_1303-2

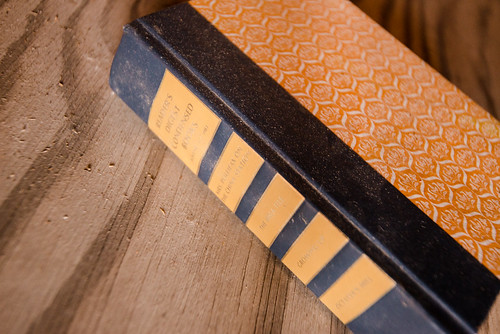
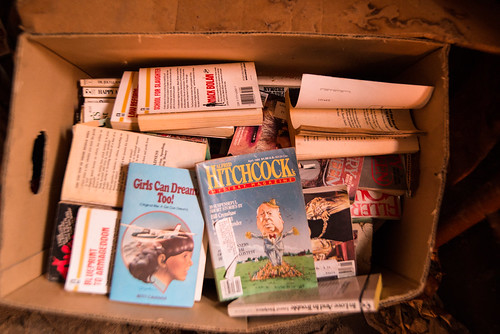
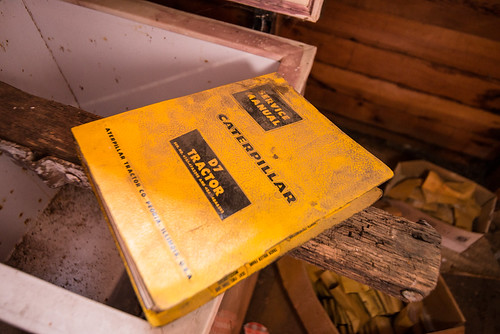
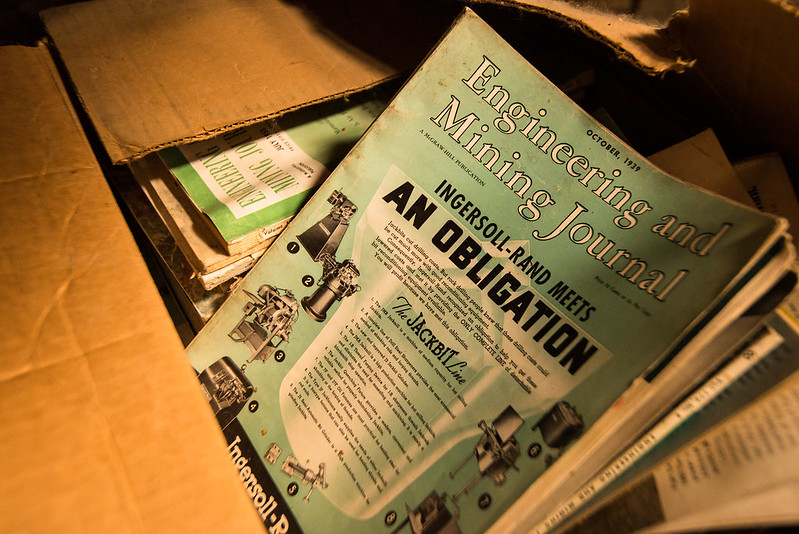
1939 mining journals. I think the mine was most active in the 30's-50's, though there was a good bit of clutter from the 80's and a couple of more recent pieces:

DSC_1306-2

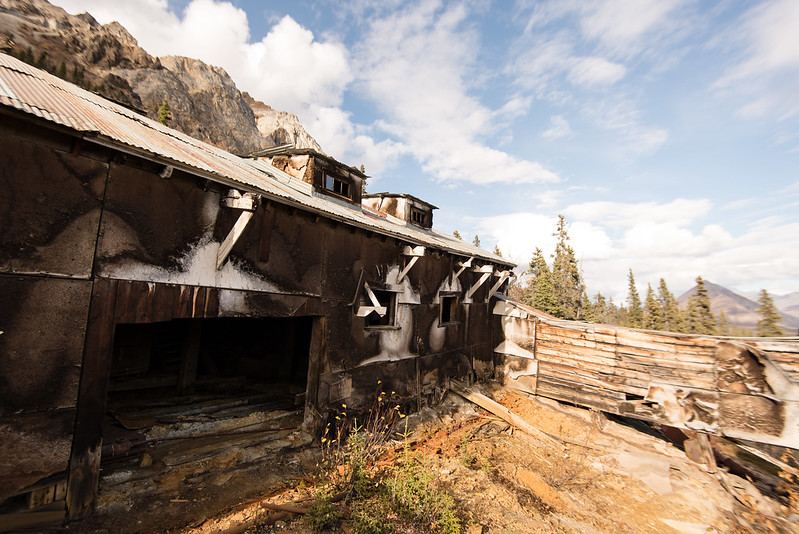
We then walked over to the processing plant for more exploring:

Nabesna AK

DSC_1322-2 DSC_1319-2

DSC_1330-2 DSC_1337-2

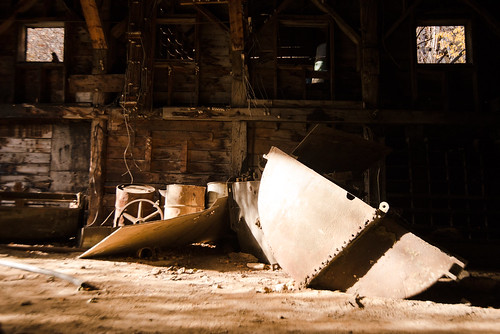
There was a chute coming from the (dry) stream uphill, leading to this big turbine:

DSC_1339-2

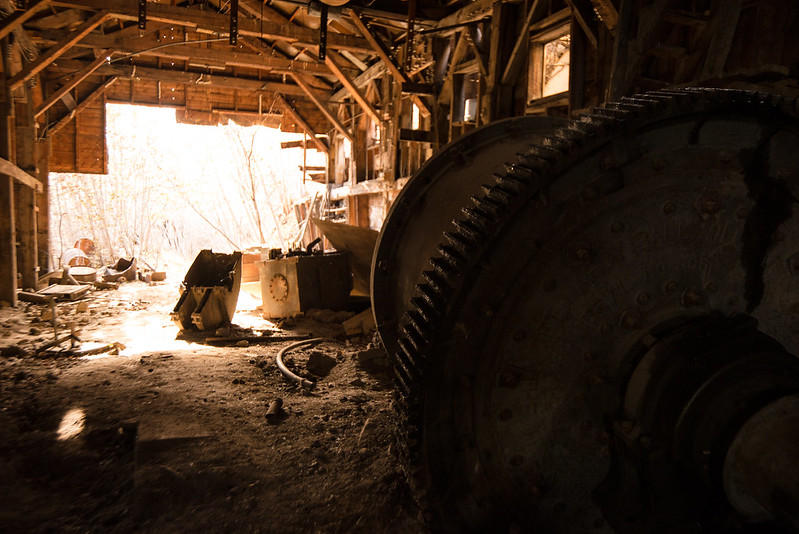
Then flywheels set in the ceiling above it:

Flywheels in the ceiling

It looks like they tapped the stream for water power, turning the turbine for electricity and the flywheels to power some machinery directly.

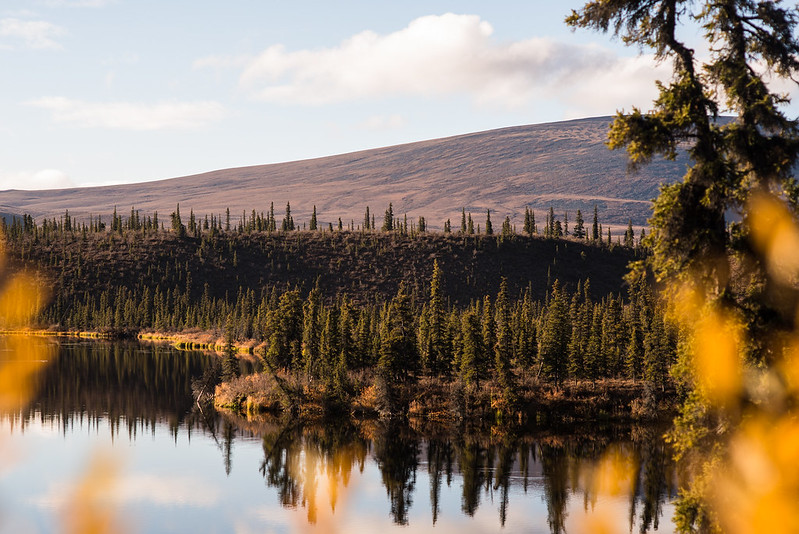
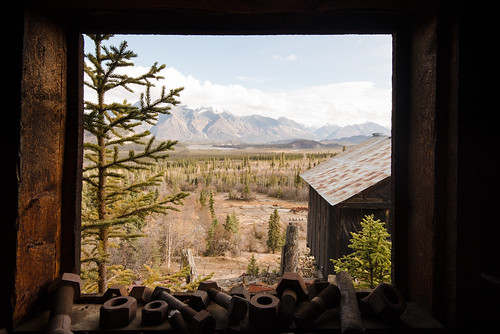
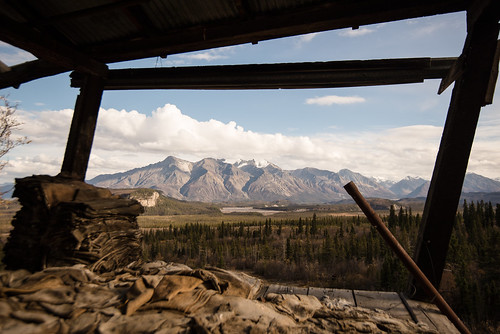
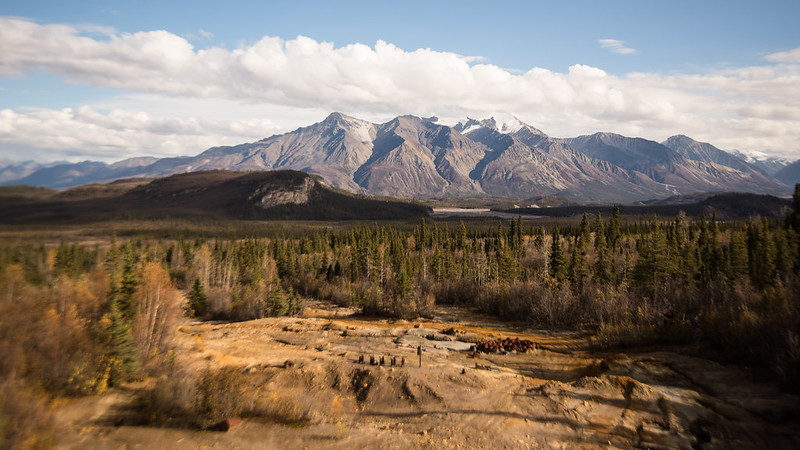
The view from the plant of the mountains and river was spectacular:

Nabesna AK

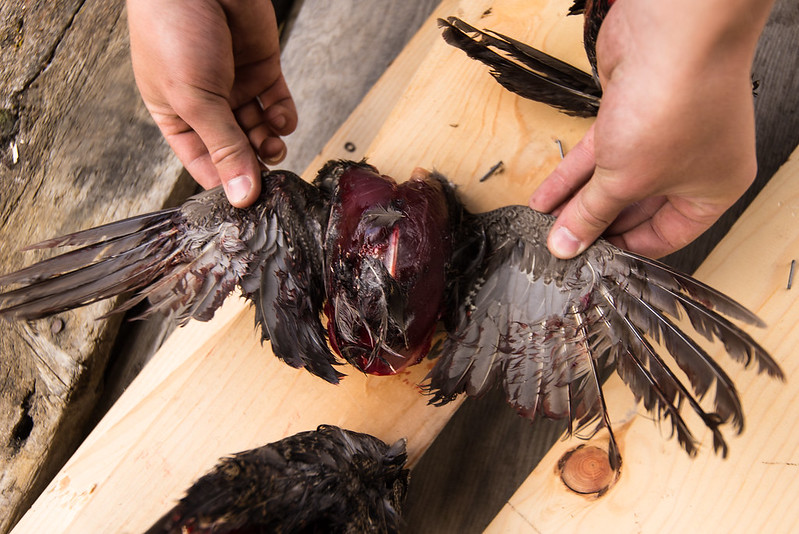
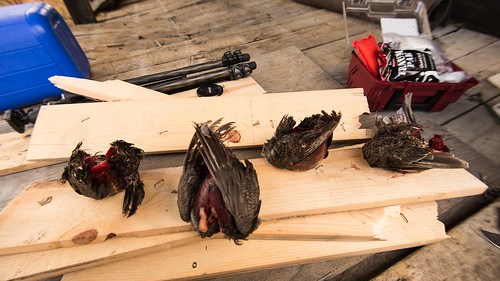
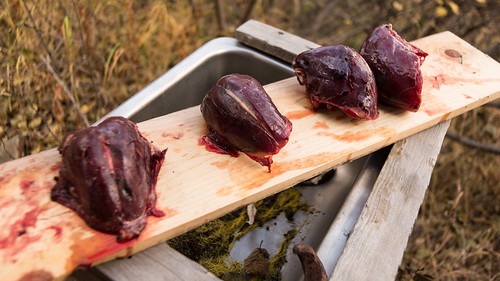
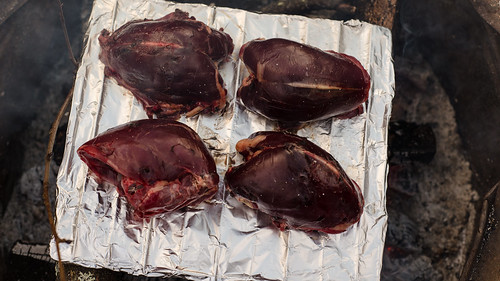
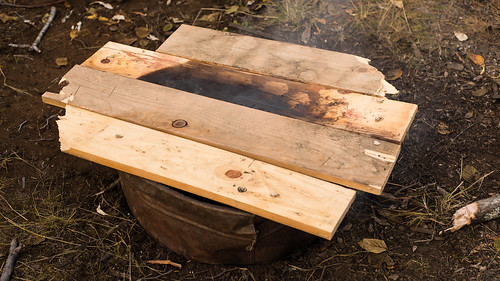
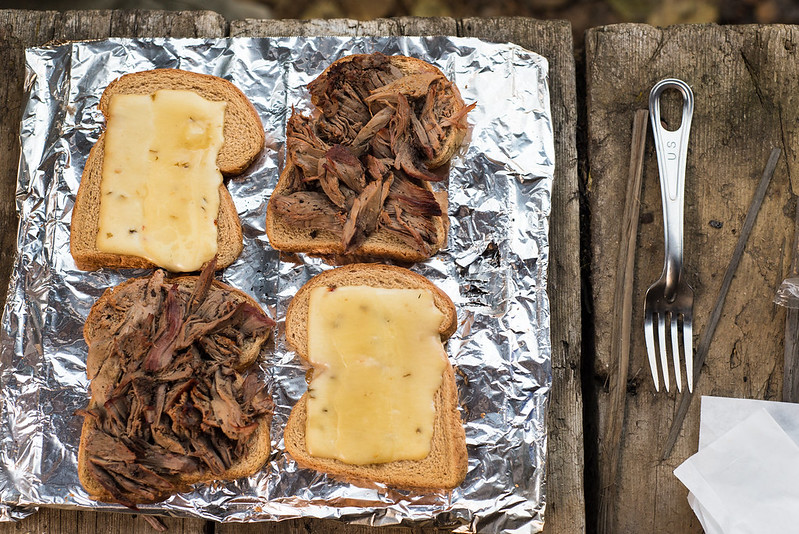
By this point it was getting late, time to cook dinner. Drew found a splitting maul and an axe so we cut some wood, cleaned the grouse breasts, and built a smoker out of some scavenged metal grate, aluminum foil from the kitchen, a beat up washtub and some planks to seal it. We ate 2.5 birds for dinner and used the rest to make toasted grouse and pepperjack sandwiches for lunch the next day.

From looking like some horrific thing from your nightmares to tasty sandwiches:

DSC_1363-2

DSC_1362-2 DSC_1364-2

DSC_1366-2 DSC_1368-2

DSC_1370-2

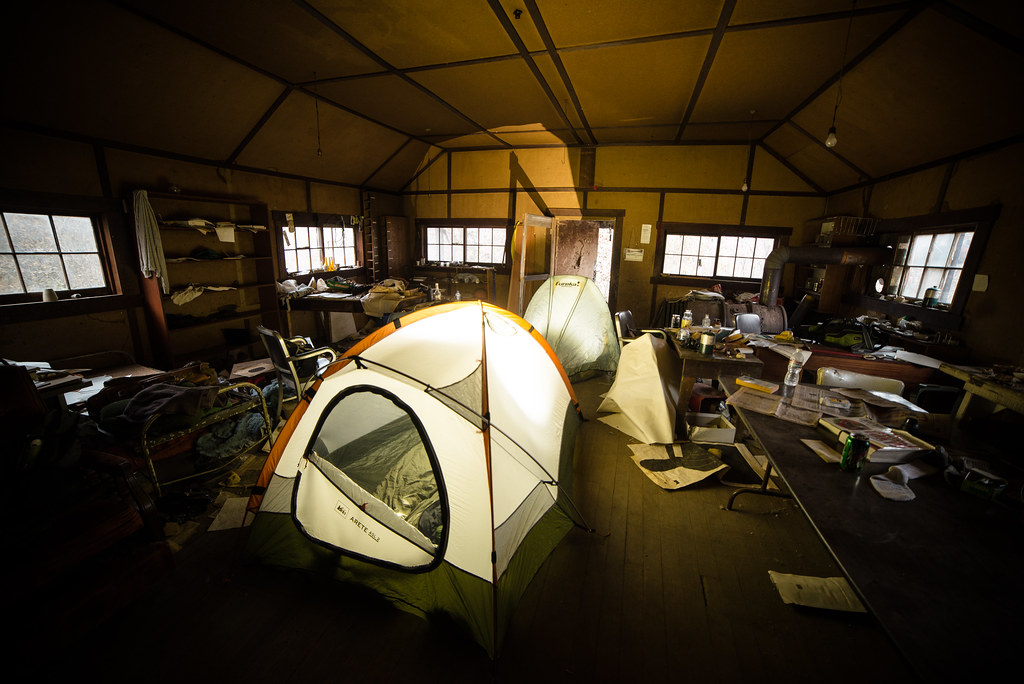
The Sun was starting to go down, and we expected it to get chilly at night so we cleared an area in the middle of the office floor to set up our tents, as seen in the first picture here. And we were never heard from again...

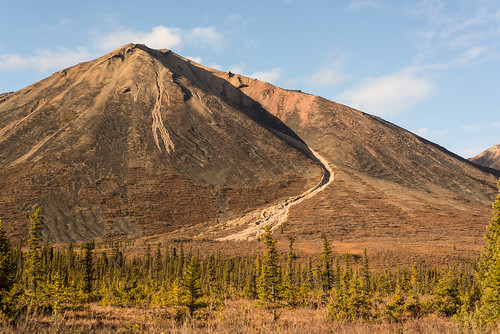
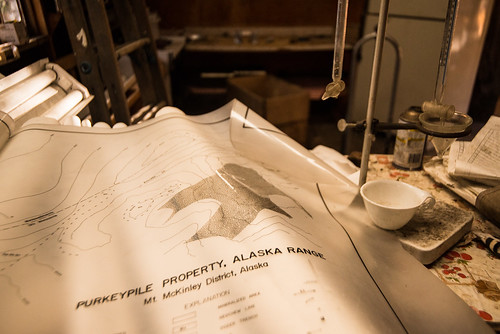
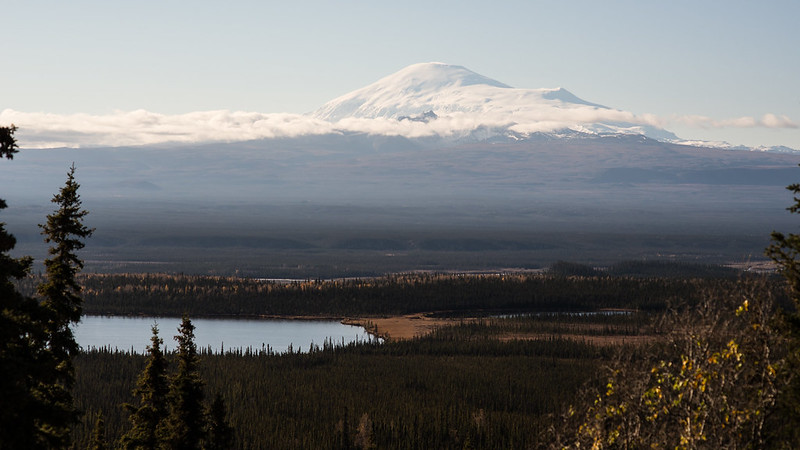
Well I can at least say it was VERY dark in my tent, in a building, under an overcast sky. But it was quiet and calm and warm(ish). I was woken up by some unidentified small animal scampering through the piles of old maps right next to my tent. We packed up and headed back to Fairbanks, with a last view of ~16,000 fot Mt Sanford on the way out:

DSC_1402-2

BONUS ADVENTURE

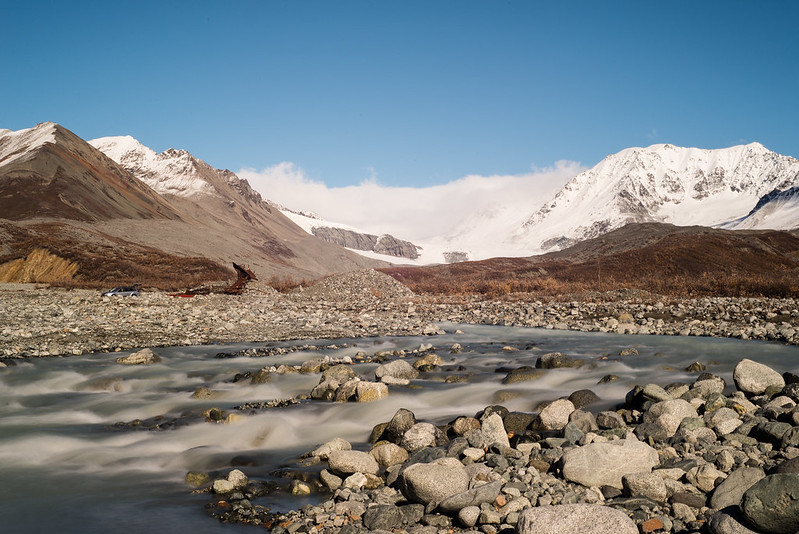
Near Isabel Pass there's a road that looks like it goes up towards a glacier. We decided to see how far it goes. The answer is 2 miles or so, as the road gradually turns into a creek. Here's 4 minutes of video from driving back out, so the creek turns more roadlike the further you go.


DSC_1432-2

Also, this:

DSC_1413-2

Monday, September 1, 2014

How to photograph the aurora: Part 2

I just saw this page shared with a beginner to help them photograph the aurora. It's typical of the advice given to amateurs, and (in my opinion) typically bad and/or irrelevant. Here's why:

Location is a key factor when preparing to photograph the northern lights. A clear shot of northern and eastern skies is helpful.

Right from the start they're advising you to do something boring. If you go somewhere that's clear and empty all the way to the north so you just see the aurora above a distant horizon, your picture will be boring.

As activity increases it normally starts from the east as Earth rotates into the aurora.

...No. The auroral surges come from the east pre-midnight because that's the direction from which the magnetic field lines are convecting. Post-midnight the auroral surges come from the west. Earth's rotation had nothing to do with this.

there are lots of other [places to photograph the aurora], just look for cars parked along the roads

And you will spend your whole night fighting the headlights and flashlights of all those people you stopped next to. And for what? The aurora looks the same a mile down the road as it does right there.

How about a tripod? If you've got one, dust it off and figure out its use before you're out in the cold, where the plastic becomes brittle and has a tendency to break in extreme temperatures.

Don't get a plastic tripod. They wobble. The whole point of a tripod is not to wobble.

Camera batteries in the cold lose power real quick ... At 40 below zero, a camera battery lasts around 20 minutes.

*Shrug* I've never needed to swap my batteries during a shoot. If I'm going to leave the camera running hands-off for a while I pull a neck gaiter over the camera, with the lens poking out one end, to keep the wind off, and my standard battery will last a couple hours at 40 below. I don't suppose it's bad advice, but it's not that big of a worry.

Keep a Ziploc bag handy for storing your camera

Take the memory card out of the camera before you go back inside, put the camera in some kind of a bag you can close, and don't open it till morning. Your backpack or regular camera bag is fine; it doesn't need to be waterproof. If you forget to take the memory card out before you go inside, just open the bag, take it out, and reclose it. Your camera will be fine.

Make sure your in-camera storage media card is clear of any other photos. Long exposures require a lot of room.

I... what? It takes the same amount of memory to store a pixel of the same value, regardless of how long it took to capture that pixel. I find aurora photos often require less storage room than daylight photos.

Lens filters can also produce what's known as a ghosting reflection between filter and front glass of the lens.

Not unless you're looking at something really bright and localized, like a street light or the moon. The aurora will not do this. The filter will, however, work as an interferometer and leave diffraction rings in your photo. This happens anytime you use the filter, but it's only noticeable when looking at a monochromatic light source like the aurora. So yeah, take your filters off... that's just not the reason why.

Rotating a lens's manual focus clockwise will set it to infinity. A good rule of thumb is to rotate the lens to infinity and then back it off just a hair. 

Which direction you rotate the lens to focus to infinity is absolutely dependent on the lens. Nikon brand lenses usually go the opposite direction of Canon brand lenses, and I use lenses on my camera that go both ways. And regardless, this is not how you should set your focus. Find the brightest far away point source, which will be the Moon if it's up, a distant street light if one's visible, or the brightest star otherwise. Point at it, switch to live view, zoom all the way in (digital/live view screen zoom, not lens zoom), and focus. You can use the chromatic aberration to set the focus: When you pass through focus the fringes change from purple to green.

Set your lens aperture to the lowest number.

Probably, but maybe not. Fast lenses usually have a lot of aberration when used wide open, and it's a lot more visible on point sources like stars than it is in daylight pictures. You're going to have to decide for yourself where you want to set the compromise between speed and sharpness. I usually shoot my f/1.8 lenses at f/2, and if the aurora is bright enough to get away with it I'll go to f/2.8.

Some cameras also have a long exposure noise reduction function. If yours has it, turn it on.

I would never use this. The camera takes a dark frame after each exposure and subtracts it from the light image. You can do this yourself in Photoshop or whatever, without wasting the time to take a new dark frame every single exposure. The aurora isn't going to wait for that.

On DSL cameras, mirror opening and closing creates most vibrations in long exposures. There are other options, though. Most cameras are equipped with a self-timer. Set it to a short time and push the shutter release to minimize camera movement. If "mirror lock up" is an option, use it.

If mirror slap is seriously causing vibrations in your aurora photos, your tripod is so worthless you might as well be balancing the camera on a rock. This is a consideration for long focal length astrophotography, not wide angle aurora work.

If the preview shows up black, do not, repeat, DO NOT, delete. Your camera will capture more than meets the eye. Due to long exposures, cameras record a lot more than the eye can process, and more than likely you won't be able to see it on the camera screen.

This is all kinds of What. A long exposure is not going to be black on your preview screen by virtue of the fact that it's a long exposure: The value of each pixel is integrated over the exposure, and the preview shows the final image, which is the total light in that pixel. If it's black on your preview screen, it's not going to get any less black on your computer. If it's merely dark on the preview, you may be okay depending on how noisy it is. And you should look at the histogram and not rely totally on the preview image: The preview image is a processed .jpg, if you're shooting RAW (and you should be) the histogram is a better idea of what you have and haven't captured. The RAW file will hold low-level stuff that doesn't show up on the preview, but this is because the preview can only show 8 bits while the RAW captures 12 or 14; it has nothing to do with the fact that it's a long exposure.

Once you've found a good exposure setting, avoid looking at the preview.

So how do you know when you need to change the exposure?

Don't breathe on or around the camera.

Okay, I will stop breathing. :/ Just direct your breath away from the optics, okay?