Thursday, June 18, 2015

Galbraith Lake - Brooks Range

Road to Sukakpak

Two weeks ago I took a weekend trip up to Galbraith Lake, on the northern edge of the Brooks Range. This is a really beautiful spot with lots of mountains and endless open tundra. No trails, just pick a direction and walk. I drove up at a time when the last few miles of the Dalton Highway into Deadhorse were closed due to washouts, which meant no truck traffic. Trucks to the oil fields are like 95% of the traffic up here, so it was just hundreds of miles of empty road through empty arctic wilderness. Perfect. My friends and I left Fairbanks on Friday night and drove up to the Arctic Circle wayside to stay at the campsite, then went the rest of the way to Galbraith Lake on Saturday morning. Spent Saturday evening hiking in the hills to the west, then camped by the cars at the Galbraith Lake campsite before driving back to Fairbanks Sunday.

We did spot a moose with two calves in the middle of the road, about 4 miles north of the Yukon River. The calves were too slow or dumb to get out of the way and the cow was on the verge of charging my car to keep us away.

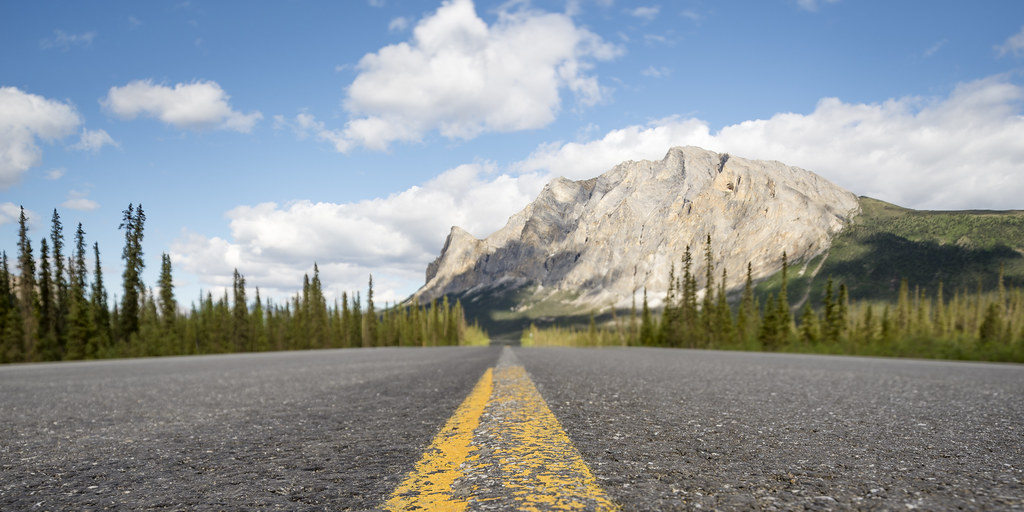
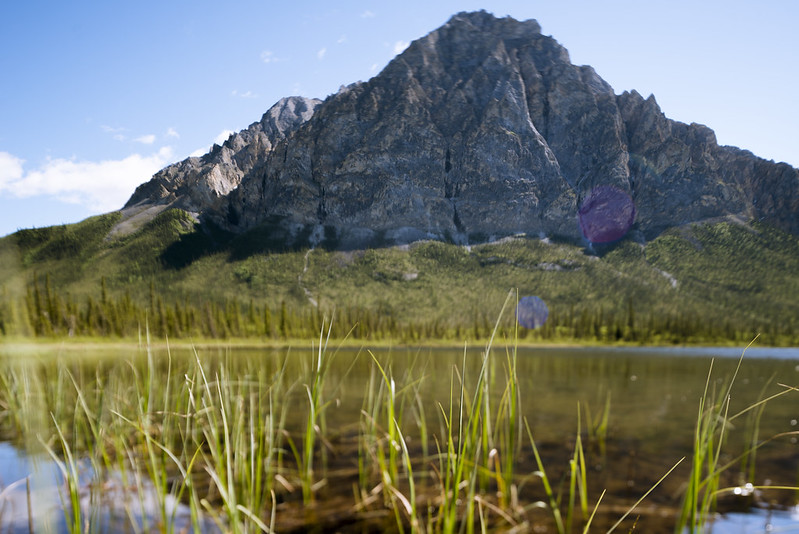
On the way north the next day we stopped at one of my favorite viewpoints, Sukakpak Mountain. It's a spectacular mountain, and I have this... spot where I've been trying to take shots of the mountain from the same spot with the same lens but in different conditions. So we stopped and I took some 'sunny, summery' photos:

Mt Sukakpak

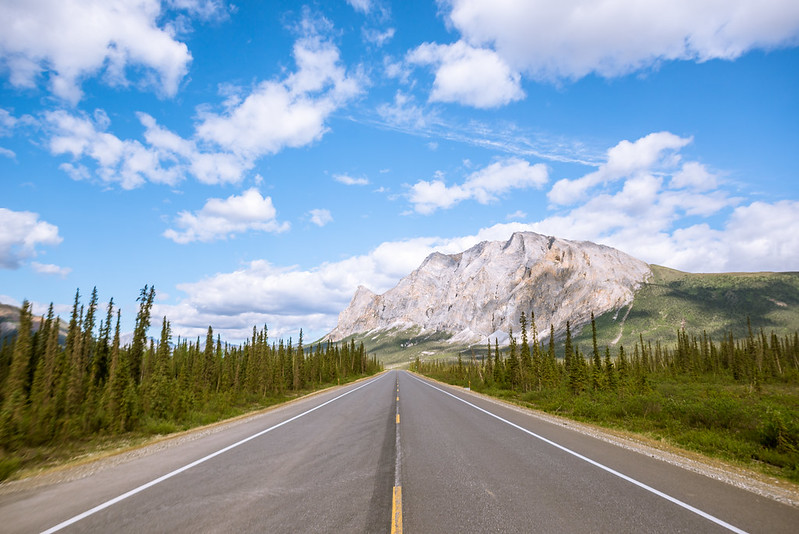
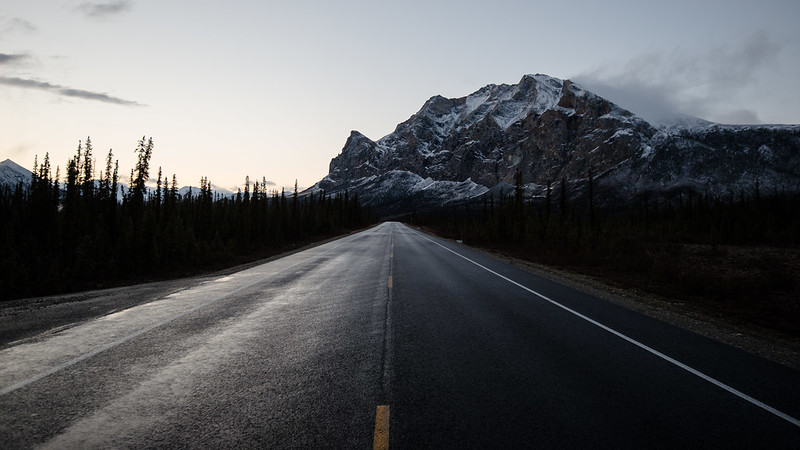
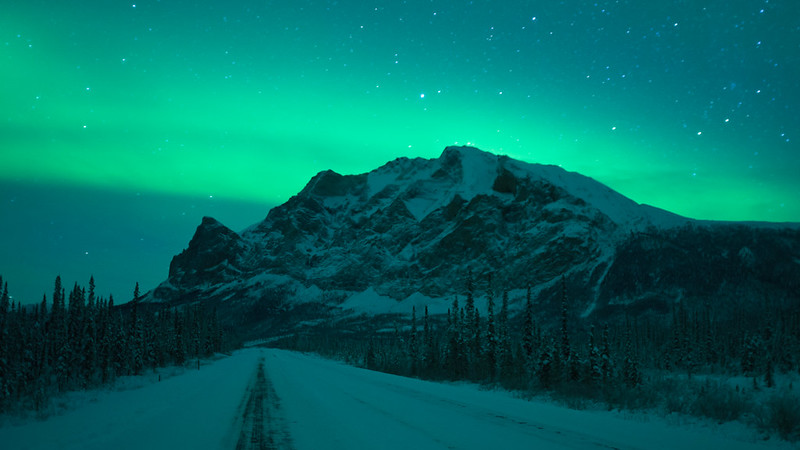
Some past shots with the same perspective and lens:

Sukakpak Mountain

Sukakpak Mountain

It was beautiful weather the whole way until we got over Atigun Pass into the Arctic Ocean drainage, where it was heavy overcast and windy. Most of the group went up the nearest highpoint but myself and one other stayed down in the pass and walked deeper into the mountains. Along the way I found quite a few old caribou bones:

Caribou skull and tundra flowers

The overcast skies brought rapidly changing weather. People in the group who woke up at various times in the morning to step outside the tent and pee, and their reports indicate that in two hours time it went from calm and warm to horizontally blowing sleet you could hardly see through, and back to calm but cold. As soon as we were south of Atigun Pass it was a beautiful day again. We stopped again at Sukakpak, this time on the north side of the mountain. The mountain is less impressive from here but there is a nice lake and another mountain that isn't named on the USGS maps. We saw a moose and calf here but I didn't try to shoot it, instead playing with my wide angle tilt/shift to shoot the unnamed (?) mountain and lake:

Lake and mountain

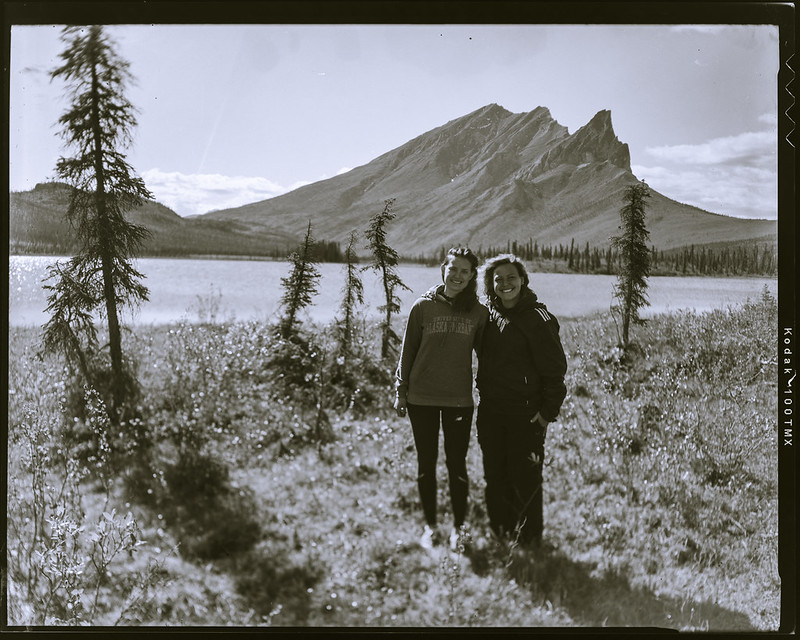
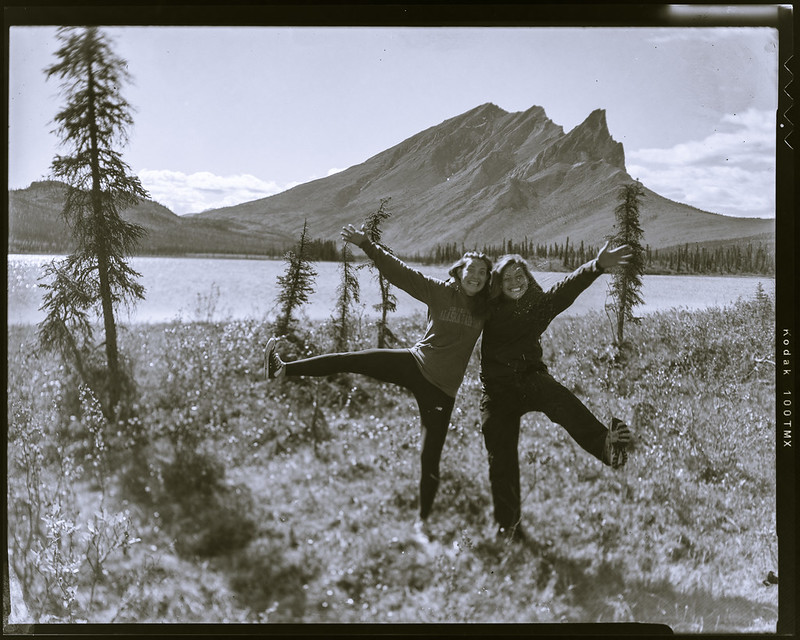
Also, I got my 4x5 view camera out and shot a few pieces of film. Here's the group (minus me) at the sign for the Arctic Circle wayside, posing as if they're an old wilderness road construction crew:

Crew

And here's a couple with the lake and the backside of Sukakpak Mountain:

Smile

Yay!

The end of a great trip, and with the lack of truck traffic it was probably the best Dalton Highway driving experience one could hope for.

Monday, February 2, 2015

Exposure

If you want to take photos in anything other than auto/preset modes, you have to understand how to set an exposure. Otherwise you're stuck asking people about 'settings' all the time - which seems to be the approach a lot of people actually take. Stop doing that because you're making this way harder than you need to. If you just ask for settings and I say 'ISO 200, f/8, 1/1000' that doesn't mean anything to you other than 'derp I'll just twist knobs until I get those numbers to show up on my camera'. You need to understand what those things do, then it's really easy to figure out the 'right settings' for any random photo you want to take.

Your camera has three knobs, and turning any of those knobs up will make the photo brighter while turning them down will make the photo dimmer. The difference is knob one decreases the in-focus area while it makes the image brighter, knob two makes moving things blur or streak while it makes the image brighter, and knob three makes more noise and less dynamic range while making the image brighter.

Knob one is your aperture, knob two is your shutter speed, and knob three is the ISO. Depending on your camera they might literally be knobs or they might be menu selections, but they always do the same thing.

So here you are, you want to take a photo but you don't know what the settings should be. Assuming this isn't a film camera, just take a photo with any random settings and see what you get. Too dark? Turn one of the knobs up. Still dark? Turn it (or a different knob) up more. Keep doing this until you produce a well exposed image. Image too light? Turn a knob down instead.

A shortcut is to take the first photo in some kind of auto or semi-auto mode then copy the settings into manual mode, this will put you 'in the ballpark'. I like aperture mode for this.

Now that you have a well exposed image, what are the settings? The real question is why should you care? They're just numbers on the screen.

But how do you know which of the three knobs to turn? That just depends on whether you'd rather change the in-focus area, change the amount of blurring on moving objects, or change the amount of noise. As an example, for a typical daytime landscape I probably want a lot of depth-of-field so I want to leave the aperture around f/8 or f/11. I want low noise (and lots of dynamic range) so I want the ISO around ISO 100. But mountains don't move around much so I can flip the shutter speed all over the place without really worrying about getting blur from moving objects.

That's the whole process - you know what side effect each of the three knobs will have on your photo, decide which side effect is the least important, and just flip that knob until the image looks good.